What Is Text Wrapping?
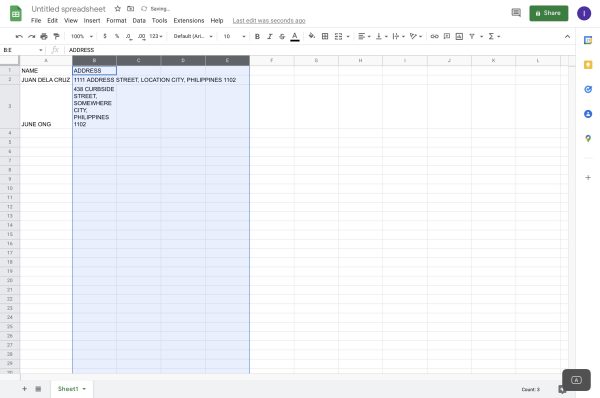
Having the right content and data is an important part of the gathering, consolidating, and reporting information through Google Sheets. However, as most students and professionals would tell you, formatting is just as important in ensuring readability. It plays a key role in readability, clarity, and the sheet’s overall organization. This is precisely why learning how to wrap text in Google Sheets is so important. That’s especially true if your sheet consists of words and sentences that need to describe or label other cells. For example, a database for an event might have a column for addresses and another for long descriptions. Now, if you’re new to the Google Sheets app, you might be wondering what this excel wrap text feature is. Usually, the long text would simply bleed out from one cell and overlap the numerous cells next to it. Text wrapping prevents this by letting a cell’s borders wrap around the entire sentence or paragraph. As a result, the long string of text will only occupy the cell it originated from without overlapping other cells. However, doing this will expand the cell height (which you can mitigate by elongating the cell column’s width). You can also check out our Google Workspace feature article.
How to Wrap Text in Google Sheets: Selecting Cells
Regardless of how you’ll wrap text, there’s one universal action you must learn: how to select cells. Of course, selecting a single cell in Google Sheets is fairly easy. You simply point your mouse’s cursor to it and click. However, if you want to apply the text wrap to multiple cells, you’ll have to highlight multiple at once. You can select multiple by pressing and holding your cursor while hovering over the cells you need to highlight. For highlighting individual cells farther apart, simply hold the Command Key (Mac) or Windows Key (PC). Then press each cell you need to highlight with your cursor. If you need to highlight whole rows or columns, you can do so as well. To do this, simply click on the row number or column letter you want to highlight. For example, clicking on column “A” will highlight the entire first column of the sheet. Meanwhile, clicking row “4” will highlight the entire fourth column within the sheet. Finally, to select the entire sheet, simply click the cell above row 1 to the left of column A. Alternatively, you can also use the keyboard shortcut Ctrl + A (PC) or Command + A (Mac).
How to Wrap Text in Google Sheets?
Eager to learn how to make text wrap in Google Sheets? Here are some methods you can use to do this.
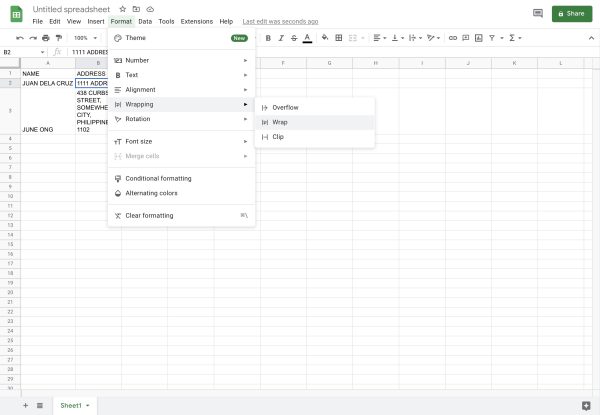
Using the Format Menu
You can easily wrap sheets by using the Format menu in the menu bar. Simply select the cell (or cells) you want and proceed to the following steps:
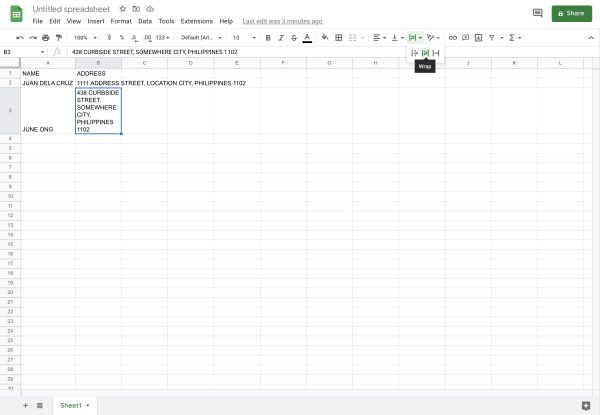
Using the Toolbar
You can also wrap sheets and cells by using the Google Sheet Toolbar. It’s a great alternative method for how to wrap text in Google Sheets if you don’t want to use the Menu. Like the first method, all you must do is select the cell or cells. Afterward, locate the Toolbar within Google Sheets. This should be the row under the Menu bar showcasing various icons and text formatting buttons. It houses your classic Bold, Italic, and Underline buttons as well as the tools to format font and size. Once located, hit the text wrapping icon on the. If you’re confused, it’s the right arrow icon with a line to the left and a line in the middle. It’s situated between the vertical alignment and text rotation icons. If the icon is missing, you might need to click the “More” button (triple dots icon). The text wrapping icon should show in this area. Simply click on it, and a pop-up menu should appear showing three icons. Choose the second one (sideways U-turn arrow) to wrap the text. If you’re confused about what these icons mean, you can always hover your cursor over each one. This will show you the names of these icons to help you select the right one.
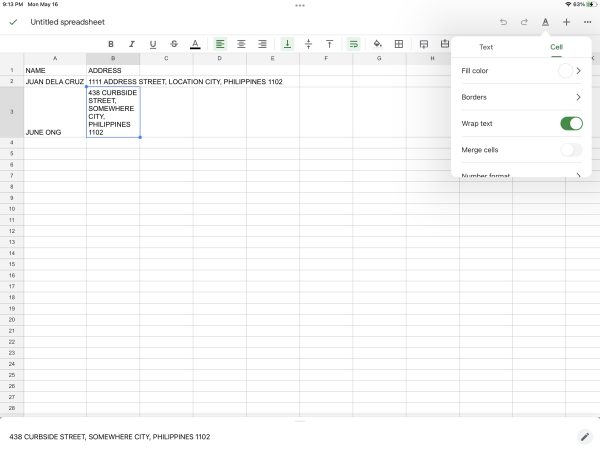
Via Mobile
Learning how to wrap text in a cell in Google Sheets is fairly easy. However, the method is different when you’re trying to wrap text on mobile. To learn how to wrap text in Google Sheets with a phone or tablet, see the following:
Can You Make the Text Wrapping Default?
Now, you might be wondering: how do I make text wrap default in Google Sheets? After all, the text wrapping feature is convenient and useful for most users and use cases. Why not make it the default option? Unfortunately, there’s no such feature within Google Sheets at the moment. You can format Google Sheets, text-wrap, and expand cells all you want in one sheet. However, the moment you make a new sheet, the formatting resets to overflow by default.
Can You Wrap Text Around Charts or Images?
Unfortunately, a Google Sheets chart wrap text feature is not available within the platform. It is available on other tools like Google Docs. However, because Sheets works with cells, Google doesn’t provide an option to automatically wrap text based on images or charts.
How to Fix Text Wrapping If It Is Not Working
If you find that in Google Sheets the text wrap is not working, you can wrap your text manually. To do this, you’ll have to introduce individual line breaks to control your line’s width. You can do so by following these steps:
How to Wrap Text in Other Google Tools
Google Docs
Now that you know how to wrap text in Google Sheets, you may want to learn how to do so in Docs. How this works is a little different in that text wrapping here isn’t based on cells. Instead, text wrapping in Google Docs is more about wrapping the text around photos. This allows you to format your document in different ways and present it in different styles. To apply it, just follow these steps:
Google Slides
Learning how to wrap text in Google Sheets is a little different from Google Slides. The two tools work very differently so the steps are, likewise, not the same. Here’s how to wrap text in Google Slides. The text within the text box will wrap as you resize. You can further modify and beautify the design of the presentation by adjusting the text’s alignment.
Uses of Text Wrapping
Learning how to wrap text in Google Sheets is essential to the Google Workspace user. Sure, you can get by simply letting long strings of text-overflow for some files. That’s true if you only want to make a reference tool or database you can copy text from. However, if presentation and organization are important to you, learning how to wrap text in Google Sheets should be, too. That’s because text wrapping allows users to read the entirety of what a cell contains without scrolling too far right. It’s also great for showcasing entire chunks of text within multiple cells without overlapping, thus making it more readable.
Text Wrap Text in Google Sheets Today!
Learning how to wrap text in Google Sheets is a basic skill. That’s true whether you’re a student, office worker, or industry professional who works with teams. It’s also useful for instances when you make Google Sheet files for yourself if you want to maintain readability. Regardless of the use case, it’s the knowledge you can’t go without.