However, while a new OS update may solve an issue, it can also prompt another few to appear. The Windows 10 1903 update of yesteryear was infamous for causing more problems than it solved. Some users reported that the 1903 update caused their CPU usage to shoot up by 30 percent and in some situations, by 100 percent. This made their personal computers frustratingly slow and had them pulling their hair out. A few other common issues that may occur after updating are extreme system freezes, prolonged startup times, unresponsive mouse clicks and key presses, blue screen of death, etc. In this article, we will be providing you with 8 different solutions to improve your computer’s performance and make it as snappier as it was before you installed the latest Windows 10 update.
Fix Windows 10 running slow after update problem
Your Windows 10 computer may be running slow if the current update hasn’t been installed properly or is incompatible with your system. Sometimes a new update can damage a set of device drivers or render system files corrupt prompting low performance. Lastly, the update itself may be full of bugs in which case you will have to roll back to the previous build or wait for Microsoft to release a new one.
Fix Windows 10 running slow after update problem Method 1: Look for any new update Method 2: Disable Startup & Background Applications Method 3: Perform a Clean Boot Method 4: Remove Unwanted and Malware applications Method 5: Update All Drivers Method 6: Repair Corrupt System Files Method 7: Modify Pagefile size & Disable Visual Effects Method 8: Uninstall the new update
Other common solutions for Windows 10 running slow include disabling high-impact startup programs, restricting applications from running in the background , updating all device drivers, uninstalling bloatware and malware, repairing corrupt system files, etc.
Method 1: Look for any new update
As mentioned earlier, Microsoft regularly releases new updates fixing issues in the previous ones. If the performance issue is an inherent problem with an update, then chances are Microsoft is already aware and has most likely released a patch for it. So before we move onto the more permanent and lengthy solutions, check for any new Windows updates.
Press the Windows key to bring up the start menu and click on the cogwheel icon to open Windows Settings (or use the hotkey combination Windows key + I).
Click on Update & Security.
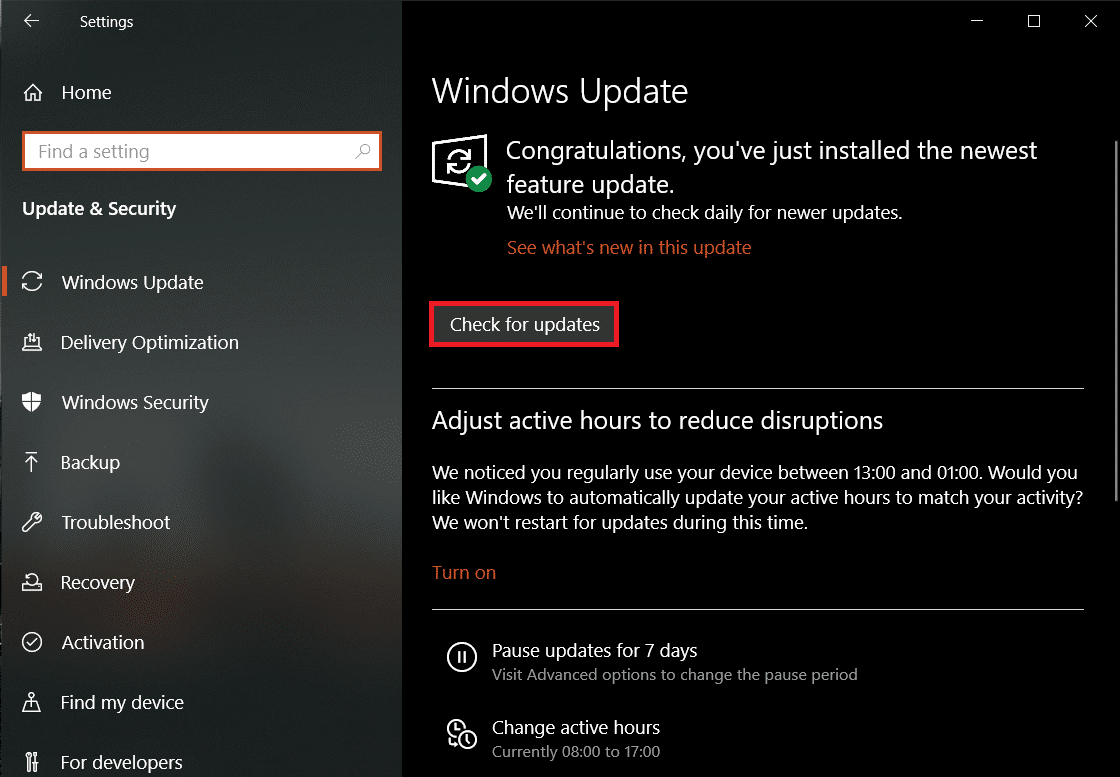
On the Windows Update page, click on Check for Updates.
If a new update is indeed available, download and install it as soon as possible to fix your computer’s performance.
Method 2: Disable Startup & Background Applications
All of us have a bunch of third-party applications installed that we barely use, but keep them nevertheless for when a rare opportunity arises. Some of these may have the permission to start automatically every time your computer boots up and as a result, increase the overall startup time. Along with these third-party applications, Microsoft bundles in a long list of native applications that are allowed to always run in the background. Restricting these background apps and disabling high-impact startup programs can help free up some useful system resources.
Right-click on the taskbar at the bottom of your screen and select Task Manager from the ensuing context menu (or press Ctrl + Shift + Esc on your keyboard).
Switch to the Startup tab of the Task Manager window.
Check the Startup impact column to see which program utilizes the most resources and therefore, has a high impact on your startup time. If you find an application that you do not use frequently, consider disabling it from launching automatically at startup. 4. To do so, right-click on an application and select Disable (or click on the Disable button at the bottom-right).
To disable native applications from staying active in the background:
Open Windows Settings and click on Privacy.
From the left panel, click on Background apps.
Toggle off ‘Let apps run in the background’ to disable all background applications or go ahead and individually select which apps can continue running in the background & which ones can’t.
Restart your PC and see if you’re able to fix Windows 10 running slow after an update problem.
Method 3: Perform a Clean Boot
If a specific application is causing your computer to run slow, you can pinpoint it by performing a clean boot. When you initiate a clean boot, the OS loads only the essential drivers and default applications. This helps avoid any software conflicts caused due to third-party applications that might be prompting low performance.
We will need to open the System Configuration application to perform a clean boot. To open it, type msconfig in either the Run command box (Windows key + R) or the search bar and press enter.
Under the General tab, enable Selective startup by clicking on the radio button next to it. 3. Once you enable Selective startup, the options underneath it will also unlock. Check the box next to Load system services. Ensure the Load startup items option is disabled (unticked).
Now, move over to the Services tab and tick the box next to Hide all Microsoft services. Next, click Disable all. By doing this, you terminated all third-party processes and services that were running in the background.
Finally, click on Apply followed by OK to save the changes and then Restart. Also Read: Fix Unable To Download Windows 10 Creators Update
Method 4: Remove Unwanted and Malware applications
Third-party and native applications aside, malicious software is purposely designed to hog up system resources and damage your computer. They are notorious for finding their way onto computers without ever alerting the user. One should be extremely cautious when installing applications from the internet and avoid untrusted/unverified sources (most malware programs are bundled with other applications). Also, perform regular scans to keep these memory-hungry programs at bay.
Type Windows security in the Cortana search bar (Windows key + S) and press enter to open the built-in security application and scan for malware.
Click on Virus & threat protection in the left panel.
Now, you can either run a Quick Scan or run a more thorough scan for malware by choosing Full Scan from Scan options (or if you have a third-party antivirus or antimalware program like Malwarebytes, run a scan through them).
Method 5: Update All Drivers
Windows updates are infamous for messing up hardware drivers and causing them to become incompatible. Usually, it is the graphic card drivers that become incompatible/outdated and prompt performance issues. To resolve any driver-related problem, replace the outdated drivers with the latest ones via the Device Manager.
Driver Booster is the most popular driver updating applications for Windows. Head over to their official websites and download the installation file. Once downloaded, click on the .exe file to launch the installation wizard and follow all the on-screen prompts to install the application. Open the driver application and click on Scan Now. Wait for the scanning process to complete and then individually click on the Update Drivers button next to each driver or the Update All button (you will require the paid version to update all drivers with a single click).
Method 6: Repair Corrupt System Files
A poorly installed update can also end up breaking important system files and slow down your computer. System files being rendered corrupt or going missing altogether is a common issue with feature updates and leads to a variety of errors when opening apps, blue screen of death, a complete system failure, etc. To repair corrupt system files, you can either roll back to the previous Windows version or run an SFC scan. The latter of which is explained below (the former is the final solution in this list).
- Search for Command Prompt in the Windows search bar, right-click on the search result, and select Run As Administrator.
You will receive a User Account Control pop-up requesting your permission to allow Command Prompt to make changes to your system. Click on Yes to grant permission. 2. Once the Command Prompt window opens up, carefully type the following command and press enter to execute. sfc /scannow
The scanning process will take some time so sit back and let the Command Prompt do its thing. If the scan didn’t find any corrupt system files, then you will see the following text: Windows Resource Protection did not find any integrity violations.
Execute the below command (to repair Windows 10 image) if your computer continues to run slow even after running an SFC scan. DISM /Online /Cleanup-Image /RestoreHealth
Once the command finishes processing, reboot your PC and see if you’re able to fix Windows 10 running slow after an update problem. Also Read: Why are Windows 10 Updates Extremely Slow?
Method 7: Modify Pagefile size & Disable Visual Effects
Most users might be unaware of this, but along with your RAM and hard drive, there is another type of memory that dictates your computer’s performance. This additional memory is known as Paging File and is a virtual memory present on every hard disk. It serves as an extension to your RAM and your computer automatically transfers some data to the paging file when your system RAM is running low. The paging file also stores temporary data that hasn’t been accessed lately. Since it is a type of virtual memory, you can manually adjust its values and fool your computer into believing that there is more space available. Along with increasing the Paging file size, you can also consider disabling the visual effects for a crispier experience (although the aesthetics will go down). Both these adjustments can be made through the Performance Options window.
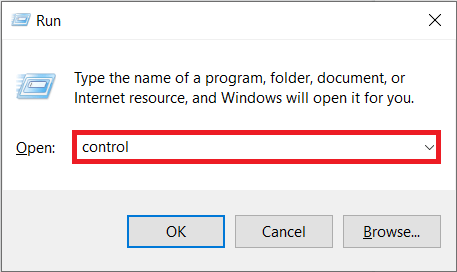
Type Control or Control Panel in the Run command box (Windows key + R) and press enter to open the application.
Click on System. To make looking for the item easier, change the icon size to large or small by clicking on the View by option at the top-right.
In the following System Properties window, click on Advanced system settings on the left.
Click on the Settings… button under Performance.
Switch to the Advanced tab of the Performance Options window and click on Change…
Untick the box next to ‘Automatically manage paging file size for all drives’.
Select the drive on which you have installed Windows (normally the C drive) and click on the radio button next to Custom size.
As a rule of thumb, the Initial size should be equal to one and a half times of the system memory (RAM) and the Maximum size should be three times the initial size.
For example: If you have 8gb of system memory on your computer, then the Initial size should be 1.5 * 8192 MB (8 GB = 8 * 1024 MB) = 12288 MB, and consequently, the Maximum size would be 12288 * 3 = 36864 MB. 9. Once you have entered the values in the boxes next to Initial and Maximum size, click on Set. 10. While we have the Performance Options window open, let’s also disable all the visual effects/animations. 11. Under the Visual Effects tab, enable Adjust for best performance to disable all effects. Finally, click on OK to save and exit.
Method 8: Uninstall the new update
Ultimately, if none of the above solutions helped you improve your computer’s performance, it might be best for you to uninstall the current update and roll back to a previous build that didn’t have any of the issues you are currently experiencing. You can always wait for Microsoft to release a better and less troublesome update in the future.
Open Windows Settings by pressing Windows key + I and click on Update & Security.
Scroll down on the right panel and click on View update history.
Next, click on the Uninstall updates hyperlink.
In the following window, click on the Installed On header to sort all feature and security OS updates based on their installation dates.
Right-click on the most recently installed update and select Uninstall. Follow the on-screen instructions that follow.
Recommended:
Windows Updates Stuck? Here are a few things you could try! Fix Windows 10 Updates Won’t Install Error
Let us know which of the above methods revived the performance of your Windows 10 computer in the comments below. Also, if your computer continues to run slow, consider upgrading from an HDD to an SSD (Check out SSD Vs HDD: Which one is better) or try increasing the amount of RAM.


![]()