It’s unnecessary to store them on an external drive, you could also create a backup on your hard disk and if necessary use this location to restore drivers. But it is advised to create a backup in the external location as if the system fails you have a way to recover drivers. So without wasting any time, let’s see How to Export Drivers Using PowerShell in Windows 10.
How to Export Drivers Using PowerShell
Make sure to create a restore point just in case something goes wrong.
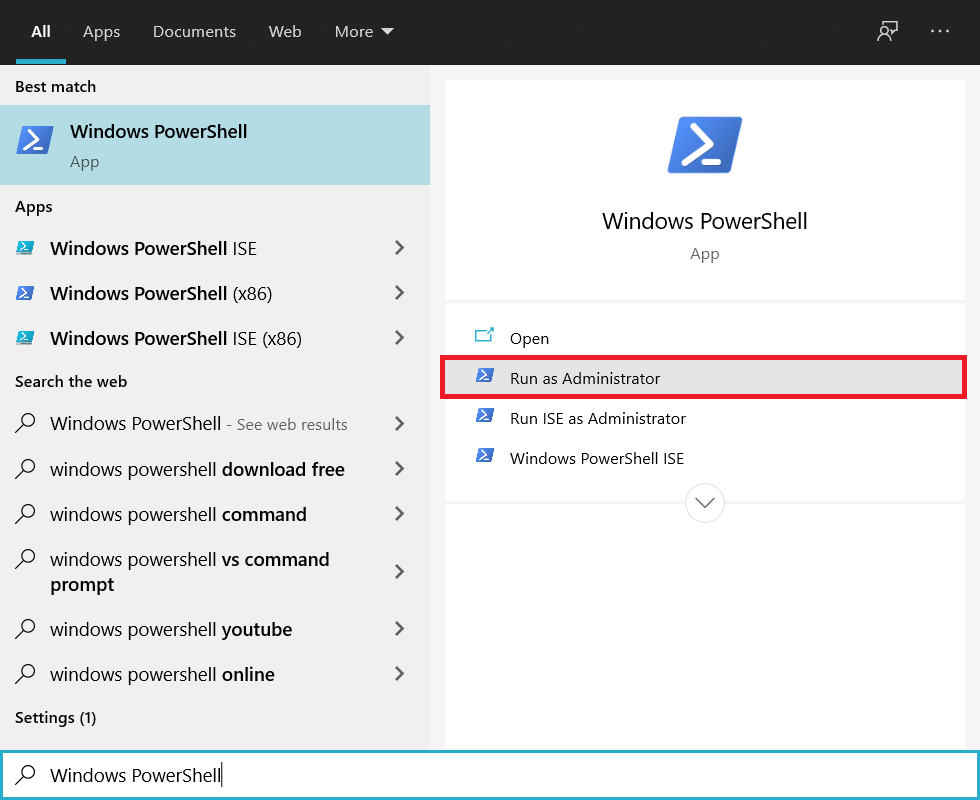
Type Powershell in Windows search then right-click on the PowerShell and select Run as administrator.
Now type the following in command and hit enter: Export-WindowsDriver -Online -Destination G:\backup Note: G:\backup is the destination directory where all the drivers would be backup if you want some other location or have another driver letter to type in the changes in the above command and then hit Enter.
This command would let Powershell began exporting the drivers to the above location, which you specified and wait for the process to finish.
If you want to extract drivers from Windows source image then you need to run the following command in PowerShell and hit Enter: Export-WindowsDriver -Path C:\Windows-image -Destination G:\backup Note: Here C:\Windows-image is the Windows source image path, so make sure to replace this with your Windows image path.
Recommended:
How to Change Desktop Icon Spacing Windows 10 Fix Windows Resource Protection found corrupt files but was unable to fix some of them How to Fix Windows Stuck on Splash Screen Show or Hide Folder Merge Conflicts in Windows 10
That’s it you have successfully learned How to Export Drivers Using PowerShell if you still have any questions regarding this guide then feel free to ask them in the comment’s section.