In short, when you are using your PC with your own user account, another user can sign into their account without you needing to sign out of your own user account. While this is a beneficial feature, it also has its disadvantages. If the user account that is not signed out has left resource-intensive apps running, it will have a performance issue on the other user who uses the PC with their user account.
Enable or Disable Fast User Switching in Windows 10
Make sure to create a restore point just in case something goes wrong.
Enable or Disable Fast User Switching in Windows 10 How to Enable Fast User Switching in Windows 10 Method 1: Using Group Policy Editor Method 2: Using Registry Editor How to Disable Fast User Switching in Windows 10 Method 1: Using Group Policy Method 2: Using Registry Editor
How to Enable Fast User Switching in Windows 10
Method 1: Using Group Policy Editor
Note: This method won’t work for Windows 10 Home users, as this method is only specified for Windows 10 Pro, Education, and Enterprise Editions.
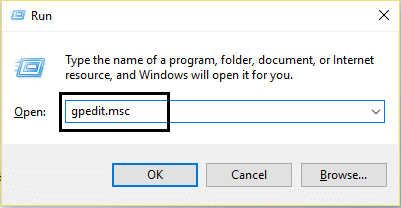
Press Windows Key + R then type gpedit.msc and hit Enter to open Group Policy Editor.
Navigate to the following policy:
Make sure to select Logon then in the right window pane double-click on the “Hide entry points for Fast User Switching” policy.
Now, under its properties window, choose the Disabled option to enable Fast User Switching in Windows 10.
Click Apply, followed by OK.
Once finished, close everything and reboot your PC to save changes. Also Read: Fix Local Print Spooler Service Is Not Running
Method 2: Using Registry Editor
Note: Make sure to backup Registry before making any changes, as Registry is a powerful tool.
Press Windows Key + R then type regedit and hit Enter to open Registry Editor.
Navigate to the following registry key:
Go to HKEY_CURRENT_USER Under HKEY_CURRENT_USER click on SOFTWARE Launch Microsoft and open Windows. Enter into CurrentVersion followed by Policies. Click System.
Search for HideFastUserSwitching. If you can’t find it then right-click on the System then select New > DWORD (32-bit) Value.
Name this newly created DWORD as HideFastUserSwitching and hit Enter.
Double-click on HideFastUserSwitching DWORD and change its value according to 0 to enable Fast User Switching in Windows 10.
Once finished, click OK and close Registry Editor.
To Save changes you need to reboot your PC. How to check if Fast User Switching is enabled in Windows 10 Please follow the steps mentioned below to check whether the Fast User Switching feature is enabled or disabled:
Press Alt +F4 keys together to open the Shut Down Windows.
If you can find the Switch user option in the scroll-down menu, then the Fast User Switching feature is enabled. Otherwise, it is disabled.
Also Read: Fix Cursor Blinking Issue on Windows 10
How to Disable Fast User Switching in Windows 10
When we use Fast User Switching mode for one or more profiles, your system might use up all the resources, and your PC may start lagging. This is most likely to diminish the performance of the system. Hence, it may become necessary to disable this feature when not in use.
Method 1: Using Group Policy
- Open Group Policy Editor then navigate to the following path:
- Double-click on Hide Entry Point for Fast User Switching window.
- If you want to disable the Fast User Switching feature, check the Enabled box and click OK.
Method 2: Using Registry Editor
Open the Run dialog box (Press Windows + R keys) and type regedit.
Navigate to the following registry key:
Double-click on HideFastUserSwitching. Note: If you can’t find the above key, create a new one using Method 2 of Enable Fast User Switching in Windows 10.
Double click on HideFastUserSwitching and set the value to 1 to disable the Fast User Switching Feature as shown in the figure.
Fast User Switching Feature is a fantastic feature in Windows PC. It enables its users to run their system with their own login for several days without affecting the running applications or files in other user accounts. The only drawback of this feature is reduced system speed & performance. Consequently, it should be enabled or disabled as per your requirement. Recommended:
Clear Your File Explorer Recent Files History in Windows 10 How to Change Feedback Frequency in Windows 10 Fix This copy of Windows is not genuine Error How to Fix Windows Update Error 80072ee2
We hope that this guide was helpful and you were able to learn “how to enable or disable Fast User Switching mode in Windows 10”. If you have any queries/comments regarding this article, then feel free to drop them in the comments section.