How to Enable Minecraft Controller Support
Minecraft comes in two versions: Java and Bedrock. There are many key differences between Minecraft Java and Bedrock versions that alter the experience for the gamers playing either version.
How to Enable Minecraft Controller Support Step 1: Add Controller Support to Steam Step 2: Add Minecraft to Steam Library Step 3: Connect Controller to PC Step 4: Configure Controller in Steam
We have summarised the differences between the two to help you choose which version should fit your gaming style the most. Minecraft is available on different platforms like PC, macOS, Linux, Xbox, and PlayStation, with handheld platforms like Nintendo Switch, Android, and iOS. Since Minecraft doesn’t support Minecraft Java controller, there is a workaround to use the Steam PC Client to add Minecraft PC controller support. The following methods will show you how to enable controller support in Minecraft Java.
Step 1: Add Controller Support to Steam
Firstly, download Steam on your system and complete the installation process. After installing Steam, follow these steps:
Open the Steam PC Client.
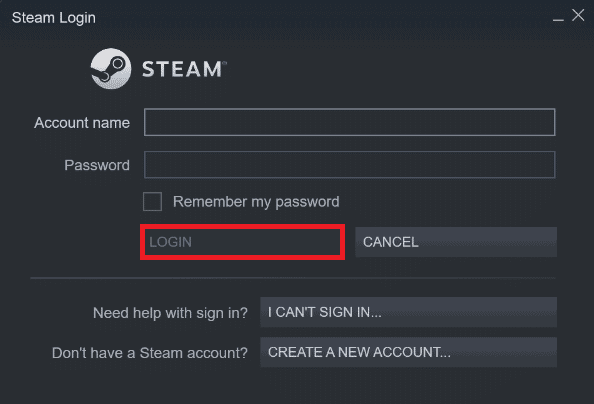
Login with your Account name and Password in the Steam application.
Click on Steam from the top left-hand corner and click Settings from the menu.
Now, click on the Controller tab on the left.
Then, click on GENERAL CONTROLLER SETTINGS, as depicted below.
Check the boxes in the Controller settings window on your system depending on the controller you own, as shown below.
PlayStation Configuration Support Xbox Configuration Support Switch Pro Configuration Support Generic Gamepad Configuration Support
- Finally, click on Back. Also Read: Fix Minecraft Login Error in Windows 10
Step 2: Add Minecraft to Steam Library
After enabling controller support in Steam, you need to add Minecraft Java to your Steam Library. For this, you need to have Minecraft already installed on your PC.
Launch the Steam PC client.
Click on Games in the menu bar.
Click on Add a Non-Steam Game to My Library.
Check the box marked Minecraft and click on ADD SELECTED PROGRAMS.
Also Read: Fix Steam Missing File Privileges in Windows 10
Step 3: Connect Controller to PC
Now to enable Minecraft controller support, add your controller to your PC by following these steps: Option I: Add Bluetooth Controller Note: Make sure your controller is in Discoverable mode before performing these steps.
Open the Settings window by pressing Windows + I keys together.
Click on Bluetooth & devices.
Then, click on Add device.
Next, select the Everything else option.
Select and add your controller from the list of available devices. Also Read: Fix Rocket League Controller Not Working in Windows 10 Option II: Add Wired Controller In the case of wired controllers, most of them these days support plug and play, meaning you don’t have to install them explicitly. You can just plug them into one of the USB ports available and wait for Windows to recognize the controller. Then, wait further to let Windows handle the installation of the controller driver automatically.
Also Read: How to Get Windows 10 Minecraft Edition for Free
Step 4: Configure Controller in Steam
Now to enable Minecraft controller support, configure the controller in Steam as shown the the steps below..
Connect your controller using the steps shown in Step 3.
Open the Steam PC Client.
Click on the LIBRARY menu.
Select Minecraft from the left pane. 5 .Click on Controller Configuration.
Assign all the controls one by one and map them to keyboard and mouse control. For movement, you can use the left joystick and map it to WASD keys on the keyboard. In a similar fashion, you could assign the camera control to the right joystick and map it to the mouse. You can also adjust the sensitivity of the controller to match your comfort level. Recommended:
20 Best ER Diagram Tools Fix FFXIV Error 90002 in Windows 10 How to Install Minecraft Texture Packs on Windows 10 Fix Minecraft Launcher is Currently Not Available in Your Account
We hope this article was helpful and you learned how to add Minecraft controller support. Also, you can send us your suggestions and queries regarding this article, or you could also write us which topic we should address next.