Administrator Account: This type of account have complete control over PC and can make any changes to PC Settings or make any type of customization or install any App. Both a Local or Microsoft account can be an administrator account. Because of virus & malware, Windows Administrator with full access to PC settings or any program becomes dangerous so the concept of UAC (User Account Control) was introduced. Now, whenever any action that requires elevated rights is performed Windows will display a UAC prompt for the administrator to confirm Yes or No. Standard Account: This type of account has very limited control over the PC and was intended for everyday usage. Similar to Administrator Account, a Standard Account can be a local account or Microsoft account. Standard Users can run apps but can’t install new apps and change system settings that do not affect other users. If any task is performed which requires elevated rights then Windows will display a UAC prompt for the username and password of an administrator account in order to pass through UAC. Now after installing Windows, you may want to add another user as the Standard account but in future, you may need to change that account type from standard to administrator. So without wasting any time let’s see How to Change User Account Type in Windows 10 from Standard Account to Administrator Account or vice-versa with the help of the below-listed tutorial. Note: For this, you need to keep at least one administrator account enabled on the PC all the time to perform the below steps.
How to Change User Account Type in Windows 10
Make sure to create a restore point just in case something goes wrong.
How to Change User Account Type in Windows 10 Method 1: Change User Account Type Using Settings Method 2: Change User Account Type Using Control Panel Method 3: Change User Account Type Using User Accounts Method 4: Change User Account Type Using Command Prompt
Method 1: Change User Account Type Using Settings
1.Press Windows Key + I to open Settings then click on Accounts.
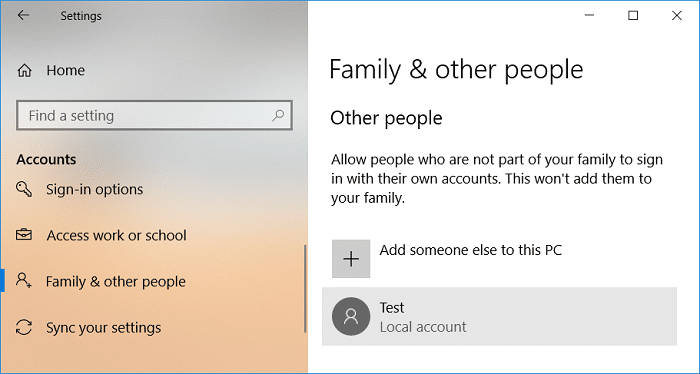
2.From the left-hand menu click Family & other people. 3.Now under “Other People” click on your account for which you want to change the account type.
4.Under your account username click on “Change account type“.
5.From the Account type drop-down select either Standard User or Administrator depending on what you want & click Ok.
6.Close Settings then restart your PC to save changes. This is How to Change User Account Type in Windows 10 but if you still not able to, then follow the next method. Also Read: How to Change PayPal Account from Business to Personal
Method 2: Change User Account Type Using Control Panel
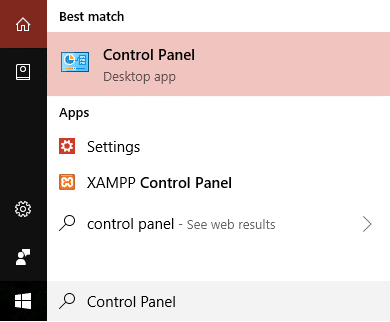
1.Type control in Windows Search then click on Control Panel from the search result.
2.Next, click on User Accounts then click “Manage another account“.
3.Click on the account for which you want to change the account type.
4.Now under your account click on “Change the account type“.
5.Select either Standard or Administrator from the account type and click Change Account Type.
This is How to Change User Account Type in Windows 10 using Control Panel.
Method 3: Change User Account Type Using User Accounts
1.Press Windows Key + R then type netplwiz and hit Enter.
2.Make sure to checkmark “Users must enter a user name and password to use this computer” then select the user account for which you want to change the account type and click Properties.
3.Switch to Group Membership tab then either choose Standard user or Administrator according to your preferences.
4.Click Apply followed by OK. 5.Close everything then reboot your PC.
Method 4: Change User Account Type Using Command Prompt
1.Press Windows Key + X then select Command Prompt (Admin).
2.Type the following command into cmd to change the account type from Standard User to Administrator and hit Enter: net localgroup Administrators “Account_Username” /add
Note: Replace Account_Username with the actual userame of the account for which you want to change the type of. You could get the username of the standard accounts using the command: net localgroup users
3.Similarly to change the account type from Administrator to Standard User use the following command: net localgroup Administrators “Account_Username” /delete net localgroup Users “Account_Username” /add
Note: Replace Account_Username with the actual userame of the account for which you want to change the type of. You could get the username of the Administrator accounts using the command: net localgroup administrators
4.You could check the type of user accounts using the following command: net localgroup Users
5.Restart your PC to save changes. Recommended:
How to Add a PIN to Your Account in Windows 10 Rename User Profile Folder in Windows 10 Find Security Identifier (SID) of User in Windows 10 How to Add a Picture Password in Windows 10
That’s it you have successfully learned How to Change User Account Type in Windows 10 but if you still have any queries regarding this tutorial then feel free to ask them in the comment’s section.