Microsoft Word: Microsoft Word is a word processor developed by Microsoft. It has been in use for many decades and it is the most used office application among other Microsoft applications available like Microsoft Excel, Microsoft PowerPoint, etc. around the world. Microsoft Word has many features which make it very easy for the users to create any document. And one of it’s most important feature is Spell Checker, which automatically checks the spelling of words in a text document. Spell Checker is a computer program which checks the spelling of the text by comparing it with a stored list of words. Since nothing is perfect, the same is the case with Microsoft Word. Users are reporting that Microsoft Word is facing the issue where the spell checker is not working anymore. Now since spell checker is one of its main features, this is a very serious issue. If you try to write any text inside the Word document and by mistake, you have written something wrong then the Microsoft Word spell checker would automatically detect it and will immediately show you a red line below the incorrect text or sentence in order to warn you that you have written something wrong.
Since the Spell Check is not working in Microsoft Word then even if you write something wrong, you will not get any kind of warning about the same. So you won’t be able to correct your spellings or grammatical errors automatically. You need to manually go through the document word by word to find any issues. I hope by now you have realized the importance of Spell Checker in Microsoft Word as it increases the efficiency of article writing. Why is my Word document is not showing spelling errors? The Spell Checker does not recognize misspelled words in Microsoft Word because of the following reasons:
Proofing tools are missing or not installed. Disabled EN-US Speller add-in. “Do not check spelling or grammar” box is checked. Another language is set as default. The following subkey exists in the registry: HKEY_CURRENT_USER\Software\Microsoft\Shared Tools\ProofingTools\1.0\Override\en-US
So, if you are facing the problem of spell checker not working in Microsoft Word then don’t worry as in this article we will discuss several methods using which you can fix this issue.
Fix Spell Check Not Working in Microsoft Word
Make sure to create a restore point just in case something goes wrong.
Fix Spell Check Not Working in Microsoft Word Method 1: Uncheck “Do not check spelling or grammar” under Language Method 2: Check Your Proofing Exceptions Method 3: Disable Do not check spelling or grammar Method 4: Rename the Proofing Tools Folder under Registry Editor Method 5: Start Microsoft Word in Safe Mode Method 6: Rename Your Word Template
Below are a few of the different methods using which you can fix the problem of Microsoft Word spell checker not working. This is not a very big issue and can be easily solved by adjusting some settings. Make sure to follow the methods in the hierarchical order.
Method 1: Uncheck “Do not check spelling or grammar” under Language
Microsoft word has special function where it automatically detects the language you are using to write the document and it tries to correct the text accordingly. Although this is a very useful feature but sometimes instead of fixing the issue, it creates more problems. To Verify Your Language & Check Spelling Options follow the below-listed steps: 1.Open Microsoft Word or you can open any Word documents on your PC. 2.Select all the text by using the shortcut Windows key + A. 3.Click on the Review tab that is available at the top of the screen. 4.Now click on the Language under Review and then click on Set Proofing Language option.
4.Now in the dialog box that opens, make sure to select the correct Language. 6.Next, Uncheck the checkbox next to “Do not check spelling or grammar” and “Detect language automatically“.
7.Once done, click on the OK button to save the changes. 8.Restart Microsoft Word to apply changes. After completing the above steps, now check if you’re able to fix Spell Check Not Working in Microsoft Word.
Method 2: Check Your Proofing Exceptions
There is feature in Microsoft Word using which you can add exceptions from all the proofing and spelling checks. This feature is utilized by users who do not wish to spell check their work while working with a custom language. Even so, if the above exceptions are added, then it can create problems and you may face Spell Check not working issue in Word. To remove exceptions follow the below steps: 1.Open Microsoft Word or you can open any Word documents on your PC. 2.From the Word menu, click on File then select Options.
3.The Word Options dialog box will open up. Now click on Proofing from the left-hand side window.
4.Under Proofing option, scroll down to the bottom to reach Exceptions for. 5.From the “Exceptions for” drop-down select All Documents.
6.Now uncheck the check-box next to “Hide spelling errors in this document only” and “Hide grammar errors in this document only”.
7.Once done, click OK to save changes. 8.Restart Microsoft Word in order to apply the changes. After your application is restarted, check if you’re able to fix Spell Checker not working in Word issue.
Method 3: Disable Do not check spelling or grammar
This is another option in Microsoft Word which can stop spelling or grammar check. This option is useful when you want to ignore certain words from spell checker. But if this option is incorrectly configured then it may lead to spell checker not working properly. To revert this setting follow the below steps: 1.Open any saved Word document on your PC. 2.Select the particular word which is not being shown in spell checker. 3.After selecting that word, press Shift + F1 key.
4.Click on the Language option under Formatting of the selected text window.
5.Now make sure to uncheck “Do not check spelling or grammar” and “Detect language automatically“.
6.Click on OK button to save the changes and restart Microsoft Word. After restarting the application, check if the Microsoft word spell checker is working fine or not.
Method 4: Rename the Proofing Tools Folder under Registry Editor
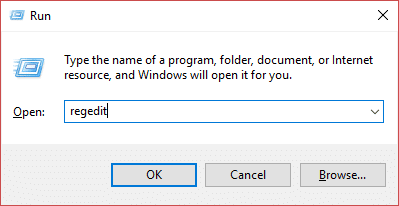
1.Press Windows Key + R then type regedit and hit Enter to open Registry.
2.Click Yes button on the UAC dialog box and the Registry Editor window will open.
3.Navigate to the following path under Registry: HKEY_CURRENT_USER\Software\Microsoft\Shared Tools\Proofing Tools
4.Under Proofing Tools, right-click on the 1.0 folder.
5.Now from the right-click context menu select Rename option.
6.Rename the folder from 1.0 to 1PRV.0
7.After renaming the folder, close the Registry and restart your PC to save changes. After completing the above steps, check if you’re able to fix Spell Check not working in Microsoft Word issue.
Method 5: Start Microsoft Word in Safe Mode
Safe mode is a reduced functionality state where Microsoft Word loads without any add-ins. Sometimes the Word Spell Checker might not work because of the conflict arising from the Word add-ins. So if you start the Microsoft Word in the safe mode then this might fix the issue.
To start Microsoft word in Safe mode, press & hold the CTRL key then double-click on any Word document to open. Click Yes to confirm that you want to open the Word document in Safe Mode. Alternatively, you can also press & hold the CTRL key then double-click on the Word shortcut on the desktop or single click if the Word shortcut is in your Start menu or on your Taskbar.
Once the document opens, press F7 to run the spell-check.
In this way, Microsoft Word Safe Mode can help you fixing the Spell Check not working issue.
Method 6: Rename Your Word Template
If the Global template either the normal.dot or normal.dotm is corrupted then you could face the Word Spell Check not working issue. The Global template is usually found in Microsoft Templates folder which is under the AppData folder. To fix this issue you will need to rename the Word Global template file. This will reset Microsoft Word to the default settings. To rename the Word Template follow the below steps: 1.Press Windows Key + R then type the following & hit Enter: %appdata%\Microsoft\Templates
2.This will open the Microsoft Word Templates folder, where you can see the normal.dot or normal.dotm file.
5.Right-click on the Normal.dotm file and select Rename from the context menu.
6.Change the file name from Normal.dotm to Normal_old.dotm. After completing the above steps, the word template will be renamed and Word settings will be reset to default. Recommended:
5 Ways to Open Local Group Policy Editor in Windows 10 Fix The Diagnostics Policy Service Is Not Running Error Fix Access denied when editing hosts file in Windows 10 3 Ways to Forget a Wi-Fi network on Windows 10
Hopefully, using one of the above methods you will be able to fix your problem of Microsoft Word Spell Check not working. If you still have any questions regarding this tutorial then feel free to ask them in the comment’s section.