This issue can occur if you have recently rebuild the search index, or accidentally deleted the index data folder, when you search for a wildcard character in Windows search etc. So without wasting any time let’s see how to Fix Searchindexer.exe High CPU Usage with the help of below-listed troubleshooting guide.
Fix Searchindexer.exe High CPU Usage
Make sure to create a restore point just in case something goes wrong.
Fix Searchindexer.exe High CPU Usage Method 1: Restart Windows Search Service Method 2: Run Search and Indexing Troubleshooter Method 3: Rebuild the Index Method 4: Troubleshoot the issue Method 5: Disable Windows Search Index Method 6: Allow the Disk to be Indexed Method 7: Run SFC and DISM Method 8: Create a New Administrator User Account Method 9: Repair Install Windows 10
Method 1: Restart Windows Search Service
Press Windows Key + R then type services.msc and hit Enter.
Find Windows Search service then right-click on it and select Properties.
Make sure to set the Startup type to Automatic and click Run if the service is not running.
Click Apply, followed by OK.
Reboot your PC to save changes and see if you’re able to Fix Searchindexer.exe High CPU Usage.
Method 2: Run Search and Indexing Troubleshooter
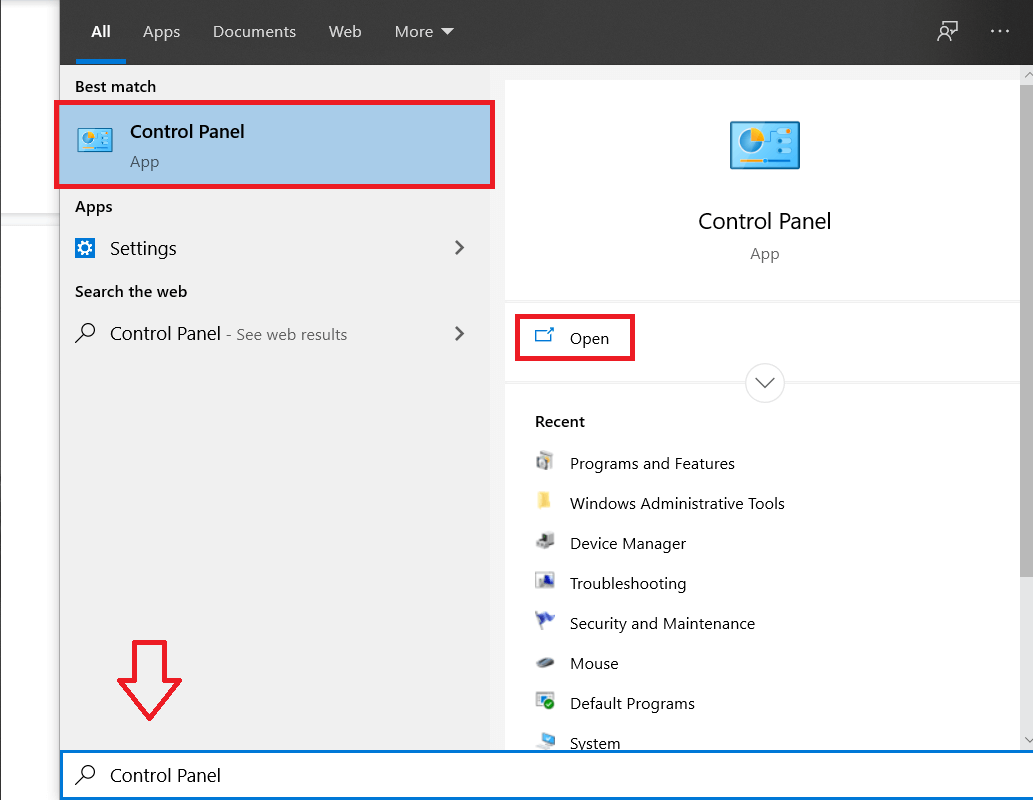
Search for the control panel from the Start Menu search bar and click on it to open the Control Panel.
Search Troubleshoot and click on Troubleshooting.
Next, click on View all in the left pane.
Click and run the Troubleshooter for Search and Indexing.
Select Files don’t appear in search results and then click Next.
The above Troubleshooter may be able to Fix Searchindexer.exe High CPU Usage issue.
Method 3: Rebuild the Index
Make sure you first boot into clean boot using this post then follow the below-listed steps.
Search for the control panel from the Start Menu search bar and click on it to open the Control Panel.
Type index in the Control Panel search and click Indexing Options.
If you can’t search for it, then open the control panel and select Small icons from the View by drop-down.
Now you will Indexing Option, click on it to open settings.
Click the Advanced button at the bottom in the Indexing Options window.
Switch to File Types tab and checkmark “Index Properties and File Contents” under How should this file be indexed.
Then click OK and again open the Advanced Options window.
Then, in the Index Settings tab and click Rebuild under Troubleshooting.
Indexing will take some time, but once it’s complete, you shouldn’t have any further problems with Searchindexer.exe.
Method 4: Troubleshoot the issue
Press Windows Key + R then type resmon and hit Enter to open Resource Monitor .
Switch to the Disk tab then checkmark all the instances of the searchprotocolhost.exe box.
In the Disk Activity window, you find the information regarding the file which is currently processed by indexing service.
Type “index” in the search box then click on Indexing Options from the search result.
Click on Modify button then exclude the directory you find in resmon in disk tab.
Click OK then close to save changes. Note: If you have a Dell PC, then the problem is with Dell Universal Connection Manager (Dell.UCM.exe). This process is constantly writing the data to log files stored in directory C:\Users\Public\Dell\UCM. To fix this issue, exclude C:\Users\Public\Dell\UCM from the indexing process.
Method 5: Disable Windows Search Index
Note: This only works for Windows 7 users.
Press Windows key + R then type control and hit Enter to open Control Panel.
Click on Uninstall a program under Programs.
From the left-hand menu, click on Turn Windows features on or off.
Scroll down till you find Windows Search then make sure untick or uncheck it.
Click Ok and reboot your PC to save changes. For Windows 10 users disable Windows Search using services.msc window.
Method 6: Allow the Disk to be Indexed
Right-click on the drive, which is not being able to produce search results.
Now checkmark “Allow indexing service to index this disk for fast file searching.”
Click Apply, followed by OK.
Reboot your PC to save changes. This should Fix Searchindexer.exe High CPU Usage issue but if not then continue to the next method.
Method 7: Run SFC and DISM
Open Command Prompt. The user can perform this step by searching for ‘cmd’ and then press Enter.
Now type the following in the cmd and hit enter:
Wait for the above process to finish and once done, restart your PC.
Again open cmd and type the following command and hit enter after each one:
Let the DISM command run and wait for it to finish.
If the above command doesn’t work, then try on the below: Note: Replace the C:\RepairSource\Windows with your repair source (Windows Installation or Recovery Disc).
Reboot your PC to save changes and see if you’re able to Fix Searchindexer.exe High CPU Usage Issue.
Method 8: Create a New Administrator User Account
- Press Windows Key + I to open Settings and then click Accounts.
2.Click on Family & other people tab in the left-hand menu and click Add someone else to this PC under Other people.
Click, I don’t have this person’s sign-in information at the bottom.
Select Add a user without a Microsoft account at the bottom.
Now type the username and password for the new account and click Next.
Once the account is created, you will be taken back to the Accounts screen, click on Change account type.
When the pop-up window appears, change the Account type to Administrator and click OK.
Now sign in to the above-created administrator account and navigate to the following path: C:\Users\Your_Old_User_Account\AppData\Local\Packages\Microsoft.Windows.Cortana_cw5n1h2txyewy Note: Make sure show hidden file and folder’s is enabled before you can navigate to the above folder.
Delete or rename the folder Microsoft.Windows.Cortana_cw5n1h2txyewy.
Reboot your PC and sign-in to the old user account, which was facing the problem.
Open PowerShell and type the following command and hit Enter:
Now restart your PC, and this will definitely fix the search results issue, once and for all.
Method 9: Repair Install Windows 10
This method is the last resort because if nothing works out, this method will surely repair all problems with your PC and Fix Searchindexer.exe High CPU Usage issue. Repair Install uses an in-place upgrade to repair issues with the system without deleting user data present on the system. So follow this article to see How to Repair Install Windows 10 Easily. Recommended:
How to Switch to tablet mode in Windows 10 Windows sockets registry entries required for network connectivity are missing How to Disable Data Logging on Windows 10 How to Enable AHCI Mode in Windows 10
That’s it you have successfully Fix Searchindexer.exe High CPU Usage but if you still have any questions regarding this guide then feel free to ask them in the comment’s section.