Sometimes you need to boot up to 4-5 time before you could see the display or even boot your PC, but there is no guarantee that it will boot. Now living in this uncertainty, that you may or may not be able to use your PC next day is not such a good thing, so you need to address this problem immediately. Now there are only a few issues which can cause this problem, so you can definitely troubleshoot this issue easily. The problem sometimes can be related to software like the main culprit seems to be Fast Startup in many cases and disabling it seems to fix the issue. But if this doesn’t fix the issue then you can be sure that the issue is related to hardware. In hardware, this can be a memory issue, faulty power supply, BIOS Settings or CMOS battery dried up, etc. So without wasting any time let’s see how to Fix Computer does not start until restarted multiple times with the help of the below-listed guide.
Fix Computer does not start until restarted multiple times
Make sure to create a restore point, just in case something goes wrong.
Fix Computer does not start until restarted multiple times Method 1: Turn Off Fast Startup Method 2: Run Automatic Repair Method 3: Reset BIOS to default settings Method 4: Check if hard disk is failing Method 5: Check Power Supply Method 6: Replace CMOS battery Method 7: ATX Resetting
Note: Some of the methods require expert supervision as you can seriously damage your PC while performing the steps, so if you don’t know what you’re doing then take your laptop/PC to a service repair center. If your PC is under warranty then opening the case can temper/void the warranty.
Method 1: Turn Off Fast Startup
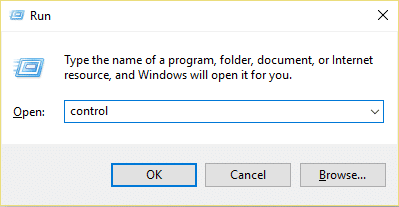
1.Press Windows Key + R then type control and hit Enter to open Control Panel.
2.Click on Hardware and Sound then click on Power Options.
3.Then from the left window pane select “Choose what the power buttons do.“
4.Now click on “Change settings that are currently unavailable.“
5.Uncheck “Turn on fast startup” and click on Save changes.
Method 2: Run Automatic Repair
1.Insert the Windows 10 bootable installation DVD and restart your PC. 2.When prompted to Press any key to boot from CD or DVD, press any key to continue.
3.Select your language preferences, and click Next. Click Repair your computer in the bottom-left.
4.On choose an option screen, click Troubleshoot.
5.On Troubleshoot screen, click Advanced option.
6.On the Advanced options screen, click Automatic Repair or Startup Repair.
7.Wait til the Windows Automatic/Startup Repairs complete. 8.Restart and you have successfully Fix Computer does not start until restarted multiple times issue, if not, continue. Also, read How to fix Automatic Repair couldn’t repair your PC.
Method 3: Reset BIOS to default settings
1.Turn off your laptop, then turn it on and simultaneously press F2, DEL or F12 (depending on your manufacturer) to enter into BIOS setup.
2.Now you’ll need to find the reset option to load the default configuration and it may be named as Reset to default, Load factory defaults, Clear BIOS settings, Load setup defaults, or something similar.
3.Select it with your arrow keys, press Enter, and confirm the operation. Your BIOS will now use its default settings. 4.Once you’re logged into Windows see if you’re able to Fix Computer does not start until restarted multiple times issue.
Method 4: Check if hard disk is failing
In many cases, the issue occurs because of the failing hard disk and to check if this is the problem here you need to disconnect the hard disk from your PC and connect it to another PC and try to boot from it. If you can boot from the hard disk without any issue on the other PC then you can be sure that the issue is not related to it.
Another way to test your hard disk is download and burn the SeaTools for DOS on a CD then run the test to check if your hard disk is failing or not. You will need to set the first boot to CD/DVD from BIOS in order for this to work.
Method 5: Check Power Supply
A faulty or failing Power Supply is generally the cause for PC not starting at the first boot. Because if the power consumption of hard disk is not met, it won’t get enough power to run and subsequently you may need to restart the PC several times before it can take the adequate power from PSU. In this case, you may need to replace the power supply with a new one or you could borrow a spare power supply to test if this is the case here.
If you have recently installed a new hardware such as video card then chances are the PSU is not able to deliver the necessary power needed by the graphic card. Just temporary remove the hardware and see if this fixes the issue. If the issue is resolved then in order to use the graphic card you may need to purchase a higher voltage Power Supply Unit.
Method 6: Replace CMOS battery
If CMOS battery has dried up or no longer deliver powers then your PC won’t start and after few days it will eventually start hanging up. In order to fix the issue, it’s advised to replace your CMOS battery.
Method 7: ATX Resetting
Note: This process generally applies to laptops, so if you have a computer then leave this method. 1.Power off your laptop then remove the power cord, leave it for few minutes. 2.Now remove the battery from behind and press & hold the power button for 15-20 seconds.
Note: Do not connect the power cord just yet, we will tell you when to do that. 3.Now plug in your power cord (battery should not be inserted) and trying booting up your laptop. 4.If it’s boot properly then again turn off your laptop. Put in the battery and again start your laptop. If the problem is still there again turn off your laptop, remove power cord & battery. Press & hold the power button for 15-20 seconds and then insert the battery. Power on the laptop and this should fix the issue. Now if any of the above methods weren’t helpful then it means the problem is with your motherboard and unfortunately, you need to replace it in order to fix the issue. Recommended:
Fix WORKER_INVALID Blue Screen Error on Windows 10 Stop Automatic Driver Downloads on Windows 10 Fix Windows Update Error 0x8007007e Fix MULTIPLE_IRP_COMPLETE_REQUESTS Error
That’s it you have successfully Fix Computer does not start until restarted multiple times issue but if you still have any queries regarding this guide then feel free to ask them in the comment’s section.