Fix Backspace Not Working in Windows 10
Make sure to create a restore point just in case something goes wrong.
Fix Backspace Not Working in Windows 10 Method 1: Turn off Sticky Keys & Filter Keys Method 2: Reinstall Keyboard Drivers Method 3: Update Keyboard Driver Method 4: Make sure Windows is up to date Method 5: Test your keyboard on another PC Method 6: Scan your PC with Anti-Malware Method 7: Disable Fast Startup Method 8: Repair Install Windows 10
Method 1: Turn off Sticky Keys & Filter Keys
Sticky Keys & Filter keys are two new ease of use function in Windows OS. Sticky keys allow users to use one key at a time when shortcuts are applied. Again, filter keys inform the keyboard for ignoring user’s brief or repeated keystrokes. If these key features are enabled, then the problem of backspace key not working may arise. To solve this issue the steps are – 1.Go to Start & search for “ease”. Then choose “Eas, of Access settings”.
2.From the left window pane, choose Keyboard. 3.Turn off the Toggle button for Sticky keys and Filter keys.
4.Now check if your backspace key is working or not.
Method 2: Reinstall Keyboard Drivers
Reinstalling your keyboard can also help you solve the issue. To do this the steps are – 1.Press Windows Key + R then type devmgmt.msc and hit Enter to open Device Manager.
2.Expand keyboards and then right-click on your keyboard device and select Uninstall.
3.If asked for confirmation select Yes/OK. 4.Reboot your PC to save changed and Windows will automatically reinstall your keyboard drivers.
Method 3: Update Keyboard Driver
In order to Fix Backspace Not Working Issue, you need to update your existing keyboard drivers with the latest version. To do this, the steps are – 1.Press Windows Key + R then type “devmgmt.msc” and hit Enter to open Device Manager.
2.Expand Keyboard then right-click on Standard PS/2 Keyboard and select Update Driver.
3.First, select Search automatically for updated driver software and wait for Windows to automatically install the latest driver.
4.Reboot your PC and see if you’re able to fix the issue, if not then continue. 5.Again go back to Device Manager and right-click on Standard PS/2 Keyboard and select Update Driver. 6.This time select “Browse my computer for driver software.“
7.On the next screen click on “Let me pick from a list of available drivers on my computer.“
8.Select the latest drivers from the list and click Next. 9.Reboot your PC to save changes and see if you’re able to Fix Backspace Not Working on Windows 10 issue.
Method 4: Make sure Windows is up to date
This may sound weird but you need to update your Windows in order to solve this issue. When you update Windows, it automatically installs latest drivers for all the devices and hence, fix the underlying issue. The step for updating your system is simple. Follow the steps to fix the issue – 1.Go to Start and type “windows update”. 2.Click on “Windows Update” from the Search result.
3.Check for updates and Install available updates.
4.Reboot your system and test your backspace key again.
Method 5: Test your keyboard on another PC
There are different ways to check whether it’s a software issue or hardware. If you are using a desktop keyboard, then you can plug it to another PC or laptop using the USB port or PS2. If your keyboard is not working properly in other PC also, then it’s time to replace your keyboard with a new one. It is recommended to buy a USB keyboard as PS2 keyboards are old and can be used with Desktop systems only.
Method 6: Scan your PC with Anti-Malware
Malware can cause tremendous trouble for your system. It can disable your mouse and make your keyboard keys stop working or even disable those keys which may stand in its path like space, delete, enter, backspace, etc. So, it is recommended to download and install applications like Malwarebytes or other anti-malware applications to scan for malware in your system. Therefore, it is recommended that you read this post in order to fix backspace key not working issue: How to use Malwarebytes Anti-Malware to remove Malware.
Method 7: Disable Fast Startup
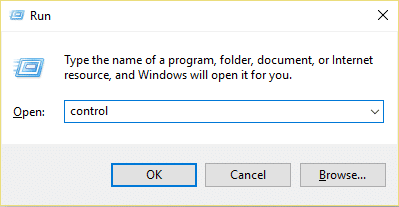
1.Press Windows Key + R then type control and hit Enter to open Control Panel.
2.Click on Hardware and Sound then click on Power Options.
3.Then from the left window pane select “Choose what the power buttons do.“
4.Now click on “Change settings that are currently unavailable.“
5.Uncheck “Turn on fast startup” and click on Save changes.
Method 8: Repair Install Windows 10
This method is the last resort because if nothing works out then this method will surely repair all problems with your PC. Repair Install just using an in-place upgrade to repair issues with the system without deleting user data present on the system. So follow this article to see How to Repair Install Windows 10 Easily. Recommended:
Stop Apps from running in the background on Windows 10 4 Ways to View Saved WiFi Passwords on Windows 10 Top 6 Best Photo Editing Apps for Windows 10 ? Fix Rotation Lock grayed out in Windows 10
I hope this article was helpful and now you can easily Fix Backspace Not Working in Windows 10, but if you still have any questions regarding this tutorial then feel free to ask them in the comment’s section.