Android phones are such bliss, am I right? It’s just a wireless, tireless, flawless box of happiness with endless features. From listening to amazing songs and watching awesome videos online, or even taking “the perfect selfie”, it does it all for you. But at times when that internal memory is full and the SD card is choked up, you gotta transfer those files to your PC. But what happens when your Windows 10 doesn’t acknowledge your phone? Heartbreaking, right? I know.
Usually, when you connect an Android phone to Windows, it will verify it as an MTP (Media Transfer Protocol) device and proceed further. Sharing content with desktops and laptops has been improved upon over the past few years and even though this can be done wirelessly, users prefer the use of a traditional cable as file transfer happens much faster and it is much more effective i.e. there is little to no risk of disconnection. However, the file transfer might not always work as expected. There have been many reports stating that the android device is not being recognized/detected on their desktop or laptop. This is a common problem among many android users.
Fix Android Phone Not Recognized On Windows 10
This is a very common complaint by numerous Android users and we, as always are here to get you out of this mess. Here are a few hacks that will help you resolve this problem.
Fix Android Phone Not Recognized On Windows 10 Method 1: Change the USB port and restart your devices Method 2: Use an Original USB Cable Method 3: Inspect Windows 10 drivers Method 4: Enable USB Debugging Method 5: Configure USB Connection Settings Method 6: Install MTP USB Device driver Method 7: Connect Phone as a storage device Method 8: Try Uninstalling Android drivers Method 9: Connect Phone as a USB Mass Storage Device Method 10: Toggle Airplane Mode Method 11: Restart Your Phone into ODIN mode Method 12: Composite ADB Interface can be the Problem Method 13: Manually Install the latest USB drivers Method 14: Reboot Your Smartphone Method 15: Delete Cache and Data
Method 1: Change the USB port and restart your devices
There is a slight possibility that the port which your device is connected to is faulty. In this case, switching to a different USB port may be effective. If the device shows up on the system as soon as it is connected, the problem is with the other USB port that the device was first connected to. If that doesn’t work, try to reboot both the devices i.e. your Windows 10 and Android device. This should work well.
Method 2: Use an Original USB Cable
Sometimes, the fault might lie within the USB cable. It is quite hard to identify the problem just by inspecting the cable from the outside and if the cable proves to be faulty it is advised to get a new one rather than looking for problems with it. Get a new USB cable and use it to connect your device to the computer. If the device shows up on “File Explorer”, then the issue is fixed. If it doesn’t, then it’s a software problem and had nothing to do with the hardware.
Method 3: Inspect Windows 10 drivers
The faulty driver could be one of the reasons for this problem. Also, Windows 10 does not recognize the Android phones, which have corrupted or faulty drivers. Nowadays, most of the Android devices use basic Media Transfer Protocol drivers to ensure the access of both internal as well as SD Cards storage. The driver must be up to date or else they can create a problem. These are the steps to update drivers on Windows 10: Step 1: Connect your phone via USB. Step 2: Right-click on the Start menu and click on Device Manager.
Step 3: Tap on View and enable the Show Hidden devices option.
Step 4: Expand all the Portable devices and then right-click on the External Storage and select Update Driver.
Step 5: The driver will start updating itself automatically. Step 6: Now, at the bottom, you will see Universal Serial Bus devices.
Step 7: Right-click on your Android icon and select Update Driver to start the driver update process. If your Android phone is still creating a problem while connecting to Windows 10, just uninstall all the drivers, and Windows will start updating the drivers automatically when the system restarts. And you should be able to Fix Android Phone Not Recognized On Windows 10 issue, if not then continue with the next method.
Method 4: Enable USB Debugging
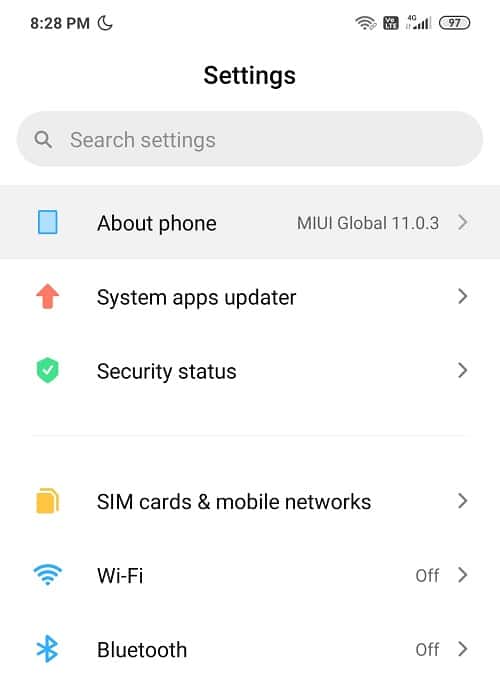
Sometimes enabling USB Debugging can help with the issue, and many users have reported that this trick has actually fixed their issue. Even though it is a long shot, but giving it a try will be worth it. You can find this feature in the Developer Option on your phone and from there you can enable it. Enabling all the options in the USB Debugging section is not necessary. These are the steps to enable USB Debugging on an Android device: Step 1: Go to Settings and look for About phone/ System.
Step 2: Now, tap on the Build number (7 times).
Step 3: Go back to Setting where you will see Developer options. Step 4: All you need to do is, look for USB Debugging and enable it. You are now set to go!=
Method 5: Configure USB Connection Settings
There is a good chance that this problem is occurring because of haywire settings. Fixing these settings will probably work in your favor. While your phone is connected to the PC, you might have to switch between different connectivity options a number of times before the Windows acknowledge your Android as a separate media device. Here are a few instructions to help you change your USB settings: Step 1: Click on Settings on your phone then find Storage in the list below.
Step 2: Press the more icon button in the extreme top right corner and select the USB computer connection. Step 3: Now, select the Media Device (MTP) under USB configuration and tap on it.
Step 4: Try connecting your Android device to your PC; it will hopefully acknowledge your phone/tablet.
Method 6: Install MTP USB Device driver
This method proves to be the most effective and is the most common reason for your device not being recognized by the system. Updating the MTP (Media Transfer Protocol) drivers will definitely resolve the issue and you may be able to browse the contents on your mobile and change i.e. add or delete contents if required. Follow these steps to install the MTP USB Device driver: Step 1: Tap Windows Key + X on the keyboard and select Device Manager from the menu.
Step 2: Expand portable devices by clicking on the arrow to its left and locate your device (Android device). Step 3: Right-click on your device and select Update Driver.
Step 4: Tap on Browse my computer for driver software.
Step 5: Click on “let me pick from a list of available drivers from my computer”.
Step 6: From the following list, select MTP USB Device and tap Next.
Step 7: After the installation of the driver is complete, reboot your PC. Step 8: Your Android device should now be recognized by the PC. If your device is still not being recognized, then it is recommended to uninstall the driver and install it again. Also Read: 6 Ways To Turn On Flashlight On Android Devices
Method 7: Connect Phone as a storage device
If your device isn’t showing up on “File Explorer”, the issue may be related to how the device is connected to the system. When connected, the phone provides a couple of options as to what has to be done with the device such as MTP, charging only, PTP, and MIDI, etc. to use the computer as a power source, or use it to transfer media & files, or just use it to transfer photos. Step 1: Connect in your Phone to your PC. Step 2: Now, a drop-down list will appear on the screen with many options, amongst which you have to select File Transfer or MTP.
Note: Options will differ from device to device and may have different names for options like Device File Manager or Transfer files.
Method 8: Try Uninstalling Android drivers
If after updating the driver your Android Phone is still not recognized then it is recommended to uninstall the driver and install it again. This is done to ensure that the drivers are installed properly and if the already installed drivers are corrupted then re-installation will probably fix the issue. Follow these steps to uninstall it: Step 1: Attach your Android device through the USB Port to your PC and open Device Manager.
Step 2: In the Device Manager, navigate to your Android device. You will probably find it under Other Devices or Portable devices. Step 3: Simply right-click on the device’s name and select Uninstall.
Step 4: After the uninstalling done with, disconnect your smartphone. Step 5: Try reconnecting it again, and wait for Windows 10 to install the drivers again automatically. Your Android should now connect and work as intended. Step 6: And you should be able to Fix Android Phone Not Recognized On Windows 10 issue, if not then continue with the next method.
Method 9: Connect Phone as a USB Mass Storage Device
If none of the above work, try to connect your phone as a USB Mass Storage Device. To connect your smartphone as a USB Mass Storage device, follow these steps: Step 1: Navigate to Settings on your phone and tap on More Settings. Step 2: Now, select USB utilities and tap on Connect Storage to PC. Step 3: Next, tap on Turn on USB storage. You may have to plug or unplug the Android phone to install the necessary drivers. Hopefully, after following the above steps, you’ll be able to fix Android Phone not recognized issue.
Method 10: Toggle Airplane Mode
This simple fix has worked for many users, so without wasting any time let’s see how to disable the Airplane mode on your Android device: Step 1: Bring down your Quick Access Bar and tap on Airplane Mode to enable it.
Step 2: Once you enable the Airplane mode, it will disconnect your Mobile network, Wi-Fi Connections, Bluetooth, etc. Step 3: Now transfer all your media & files while Airplane mode is enabled. Step 4: Once you are done transferring, disable Airplane Mode.
This should definitely help in resolving Android Phone not recognized on Windows 10 issue.
Method 11: Restart Your Phone into ODIN mode
This tip is exclusively for the Samsung device users because only they are capable of using this feature as ODIN mode is restricted to Samsung phones only. You have to be cautious while using ODIN mode, or it can cause severe damage to your device. This tool is used for flashing the Android Devices and is to be used very carefully. To use the exclusive ODIN mode, follow these steps: Step 1: Press hold the Volume Down + Home + Power buttons to turn your phone on. Step 2: Now press Volume Up and connect your Android to the PC Step 3: Let it Install the mandatory drivers automatically. Step 4: You will now have to remove your phone’s battery and Reboot your phone. Finally, connect your device to Windows 10 PC and your phone should be recognized by Windows.
Method 12: Composite ADB Interface can be the Problem
An ADB Interface is a very important feature for transferring media files from your Android device to the PC. It is used to copy media files, back and forth, run shell commands, and also to install & uninstall apps. When your Windows 10 doesn’t recognize your phone via USB, then you can count on Composite ADB Interface to fix your problem. Follow the instructions to do so: Step 1: Open Device Manager by searching for it using the Start Menu search bar.
Step 2: Now, navigate Android Composite ADB Interface. The name may differ from device to device. Step 3: Right-click on the Composite ADB Interface and select Uninstall.
Step 4: Check the Uninstall driver software for the following device. Step 5: Now, Restart your PC and try reconnecting your Android device to it.
Method 13: Manually Install the latest USB drivers
You can try downloading the USB Drivers from Google and extract the drivers on the Desktop. If you extract it anywhere else, then you need to make a note of the location as it will be required later on. Step 1: Open Device Manager and from Action click on Scan for hardware changes.
Step 2: Now navigate to Composite ADB Interface. Step 3: Right-click on it and select an Update Driver.
Step 4: Next, click on Browse my computer for driver software option.
Step 5: Go the location from where you extracted Google USB Drivers and click on Include subfolders option. Step 6: Install the drivers, click Next. Step 7: Open Command Prompt with administrative rights. Step 8: Now type the following command into cmd and hit Enter after each one:
ADB kill-server ADB start-server ADB devices
Step 9: This should work for your PC as well as for your Android. This tip is for the Android 5.0 and newer versions, but it may also work for the older versions of Android. Also Read: Fix Android Wi-Fi Connection Problems
Method 14: Reboot Your Smartphone
One of the most basic and preferable solution to put everything back in place regarding any issues in the device is restarting/rebooting the phone. This can be done by pressing and holding the “power button” and selecting “restart”.
This will take a minute or two depending on the phone and often fixes quite a few of the problems.
Method 15: Delete Cache and Data
Deleting unwanted cache & data for the External Storage and Media Storage System App will definitely fix the issue. This is a solution has got many ‘thumbs up’ from the users who had the same issue and got resolved by following the below-listed steps: Step 1: Open Settings on your Phone then tap on Apps. Step 2: Now, click on the three dots in the extreme top right and select Show All Apps. Step 3: Tap on the External Storage then press the delete button for cache and data.
Step 4: Similarly, tap on Media Storage then press the delete button for cache and data.
Step 5: Once you are done, Reboot your phone and see if you’re able to fix Android Phone not recognized on Windows 10 issue. Conclusion Hopefully, using one of the above methods will help you fix Android Phone not recognized on Windows 10. Thank you for trusting us and making us a part of your journey. If you have any questions or if you would like to add anything in the above guide then feel free to reach out in the comment section below.