Disable the User Account Control (UAC) in Windows 10
Make sure to create a restore point just in case something goes wrong.
Disable the User Account Control (UAC) in Windows 10 Method 1 – Disable User Account Control (UAC) using Control Panel Method 2 – Disable User Account Control (UAC) using Registry Editor
Method 1 – Disable User Account Control (UAC) using Control Panel
1.Search for control panel using Windows Search then click on the search result to open Control Panel.
2.Now you need to navigate to User Accounts > User Accounts under Control Panel.
3.Now click on Change User Account Control settings option in Control Panel.
4.Here you will see UAC Slider. You need to Slide the marker to the Bottom in order to disable the UAC pop up on your device.
5.Finally click OK and when you get a prompt message to confirm, click on Yes button. 6.Restart your device to apply the changes completely on your device. Note: If you want to enable the UAC again, you just need to scroll the Slider in an upward direction and save the changes. Alternatively, you can disable this feature by navigating to System and Security > Administrative Tools under Control Panel.
Here you will locate Local Security Policy. Double-click on it to open its settings. Now expand the local policies and select Security options. On the right pane, you will notice several UAC related settings. Right-click on each one of them and select Disable.
Method 2 – Disable User Account Control (UAC) using Registry Editor
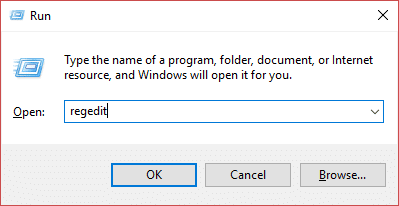
Another method to disable this feature from your device is using Windows Registry. If you are not succeeded with the above-mentioned method, you can adopt this option. Note: Control Panel method is safe for the people who are not so technical. Because changing the registry files wrongly can damage your system. Therefore, if you are changing registry files, you need to first take a complete backup of your system so that in case something goes wrong happens you can restore the system to its best working condition. 1.Press Windows + R and type regedit and hit Enter or click on OK.
2.Navigate to the following registry key: 3.On the right pane, you need to locate the EnableLUA. Right-click on it and select Modify option.
4.Here new Windows will open where you need to set DWORD value data to 0 and click OK.
5.Once you will save the data, you will notice a message on the lower right side of your device asking you to reboot your device. 6.Just restart your system to implement the changes that you made in the registry files. Once your system will restart, User Account Control (UAC) will be disabled in Windows 10. Wrapping Up: Generally, it is not recommended to disable this feature from your device because it is by default enabled to secure your system. However, in some situations where you want to disable it, you can follow the methods. The best part is that whenever you want to enable this feature, you just need to follow the same methods to enable it again. Recommended:
How to Check Your PC’s Specification on Windows 10 Fix Cannot Create HomeGroup On Windows 10 2 Ways to Create a Guest Account in Windows 10 What is a CSV file & How to open a .csv file?
I hope this article was helpful and you can now easily Disable the User Account Control (UAC) in Windows 10, but if you still have any questions regarding this tutorial then feel free to ask them in the comment’s section.