Spotify is one of the best music streaming platforms in the world. But if you’re used to listening to the HD quality of platforms like Tidal or Apple Music, Spotify’s sound quality can be quite underwhelming. Sure, getting a pair of high-end headphones would help improve the sound quality of Spotify’s non-HD audio. But not everyone has enough extra cash to spend for one. The great news is, you can tailor every song on your Spotify playlist to your preference for free using the Spotify Equalizer! That catch: you won’t be able to fully utilize it unless you understand it, and it’s not exactly that user-friendly. Worry not! In this article, we’re going to dive deep into Spotify’s equalizer and other ways you can find the perfect listening experience on the platform. Let’s get right into it.
What Can the Spotify Equalizer Do
An audio equalizer is a filter that isolates specific sound frequencies in the music to either boost, lower, or leave them unchanged. By isolating and modifying these specific frequency ranges, you significantly change your music’s overarching sound signature. For example, in hip-hop or club music, a deeper and punchier bass will be preferred. You can achieve it by boosting the bass or the 20 – 60 kHz frequencies. On the other hand, for other music genres where the details are important, like opera and jazz, an equalizer can help achieve that balanced sound signature – and make sure no specific frequencies stand out and eats up the rest. While an equalizer can help you fine-tune the sound of your music, it can also distort the audio when done improperly. This usually happens due to the limitations of your playback device. For instance, if you’re playing rock music on Spotify through a low-end Bluetooth speaker, increasing the treble in the EQ may cause your speaker to crackle due to the hardware limitation. But if you use the same EQ with studio-grade monitor speakers, the result will not be the same.
How to Access Spotify Equalizer
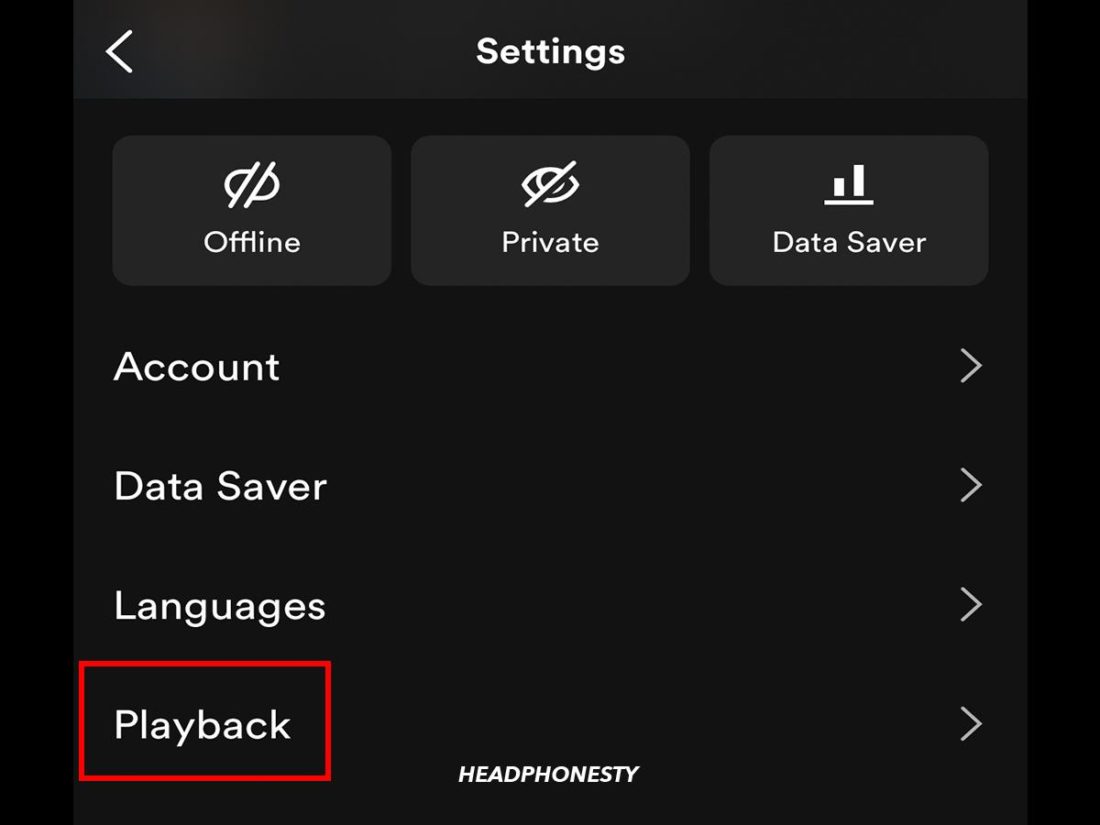
Depending on the device you’re using, there may be different ways to access Spotify’s equalizer. Here’s how you can access the Spotify Equalizer settings for Android and iOS.
On Android
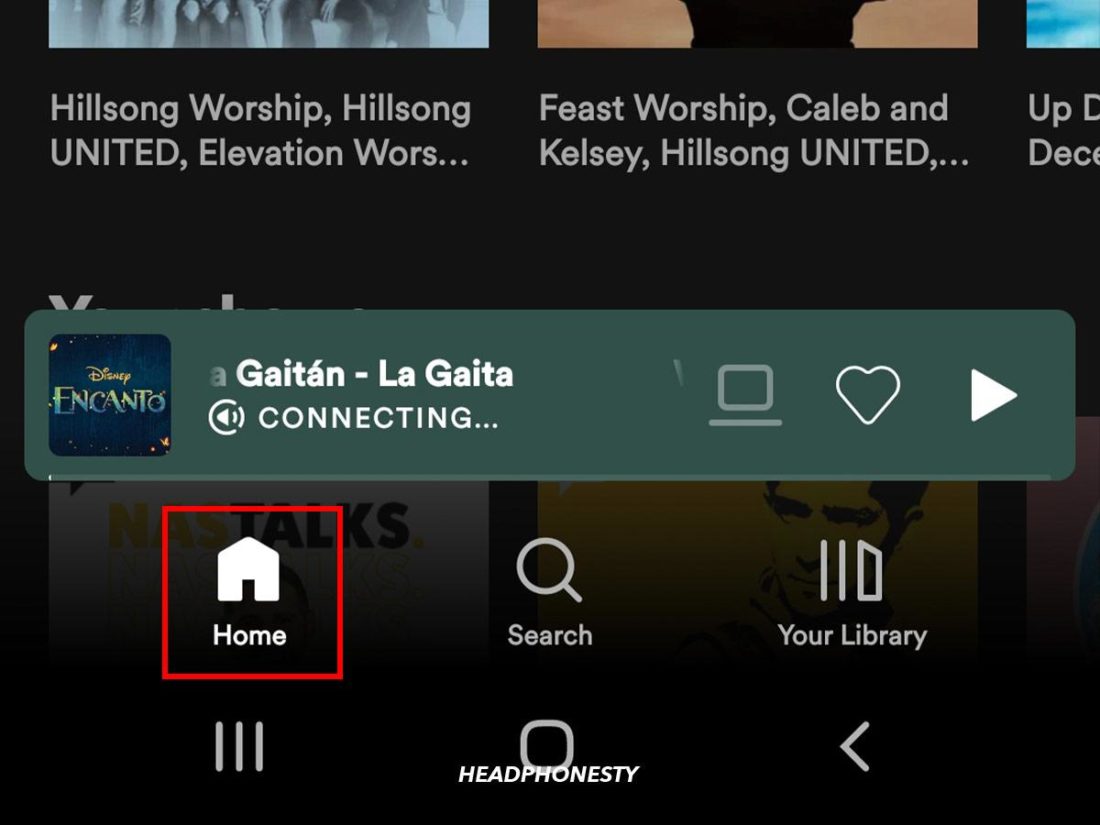
Since there are dozens of different Android versions, the availability of Spotify’s equalizer highly depends on the manufacturer. On Android devices, tapping the equalizer menu in Spotify only acts as a shortcut to your device’s native equalizer settings – not Spotify’s. Generally speaking, all Android devices (version 4.4 or later) have a native system-wide equalizer setting. But the available presets and frequency sliders may be different depending on your device and Android version. Here’s how you can access the equalizer setting on Spotify for Android:
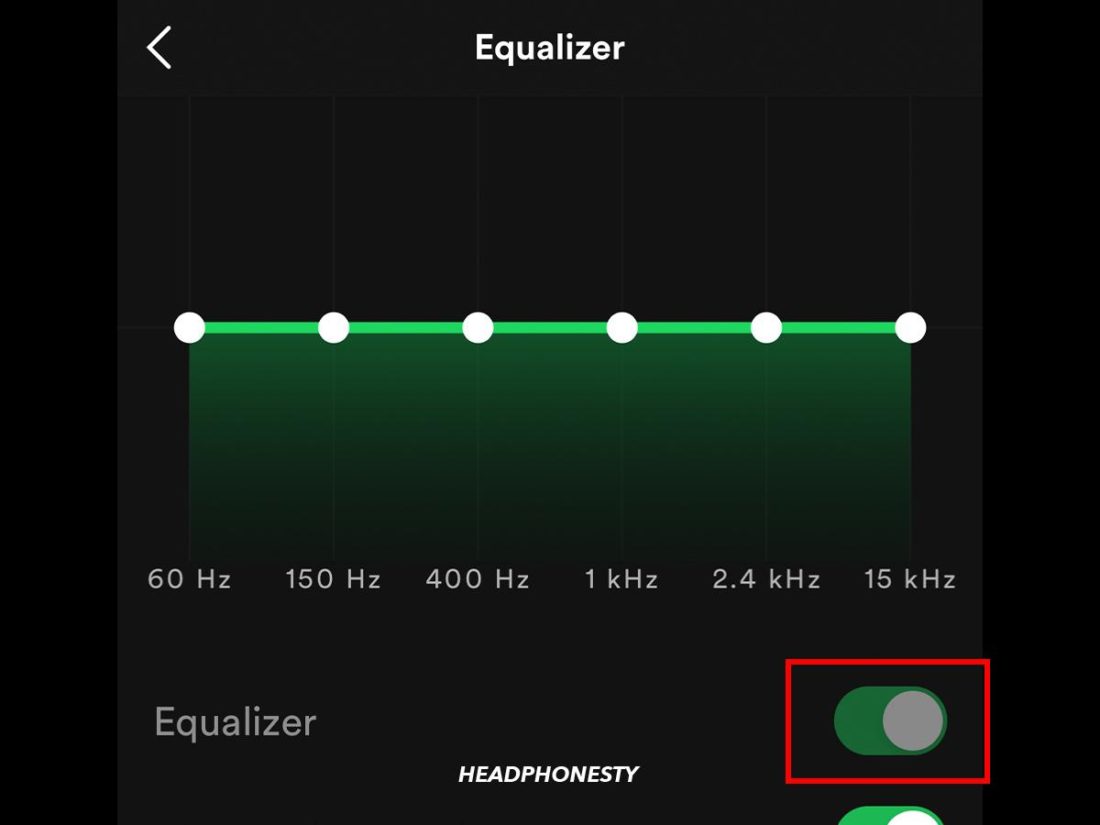
On iOS
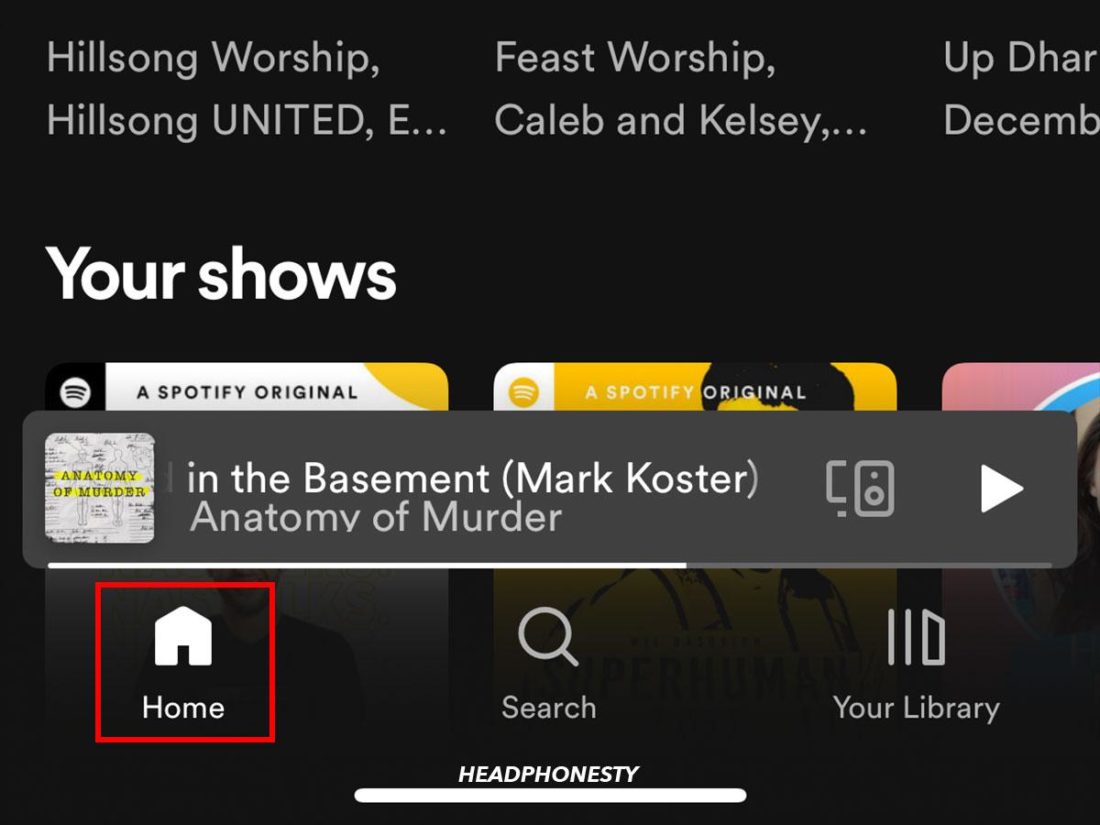
On iOS and iPadOS devices, Spotify uses its in-app equalizer that won’t affect your system sound. In other words, the equalizer settings are only used while listening to music on Spotify. Here’s how you can change the EQ settings on Spotify for iOS and iPadOS:
How to Find the Best Spotify Equalizer Settings for You
Since there is a lot of variables in creating a perfect sound, there’s really no one-size-fits-all approach to finding equalizer settings. In fact, there are two factors that make it impossible to find the ‘holy grail’ of Spotify EQ:
User preference: Some people prefer equal detail across all frequencies while others look for a punchy bass. Audio device: Speakers and headphones have an innate sound signature as a result of the manufacturer’s fine-tuning. As mentioned, some audio devices also have limitations on the frequencies they can support.
However, you can find the best EQ settings for specific music genres and sound signatures. You can achieve it by using Spotify’s EQ presets or manually adjusting the sliders to find the right sound for your music.
Spotify equalizer presets
Manually changing the frequency sliders every time you switch between music genres or go from music to podcasts will get old really quickly. When you listen to different kinds of audio files, having these presets will save you a ton of time (and from a lot of frustration). There are different sets of EQ presets for their Android and iOS apps. But even so, the presets intended to achieve the same sound characteristic (e.g., bass boost or treble boost) won’t sound exactly similar – especially if you’re using Bluetooth headphones or earbuds. But for now, let’s discuss the EQ presets that each platform uses.
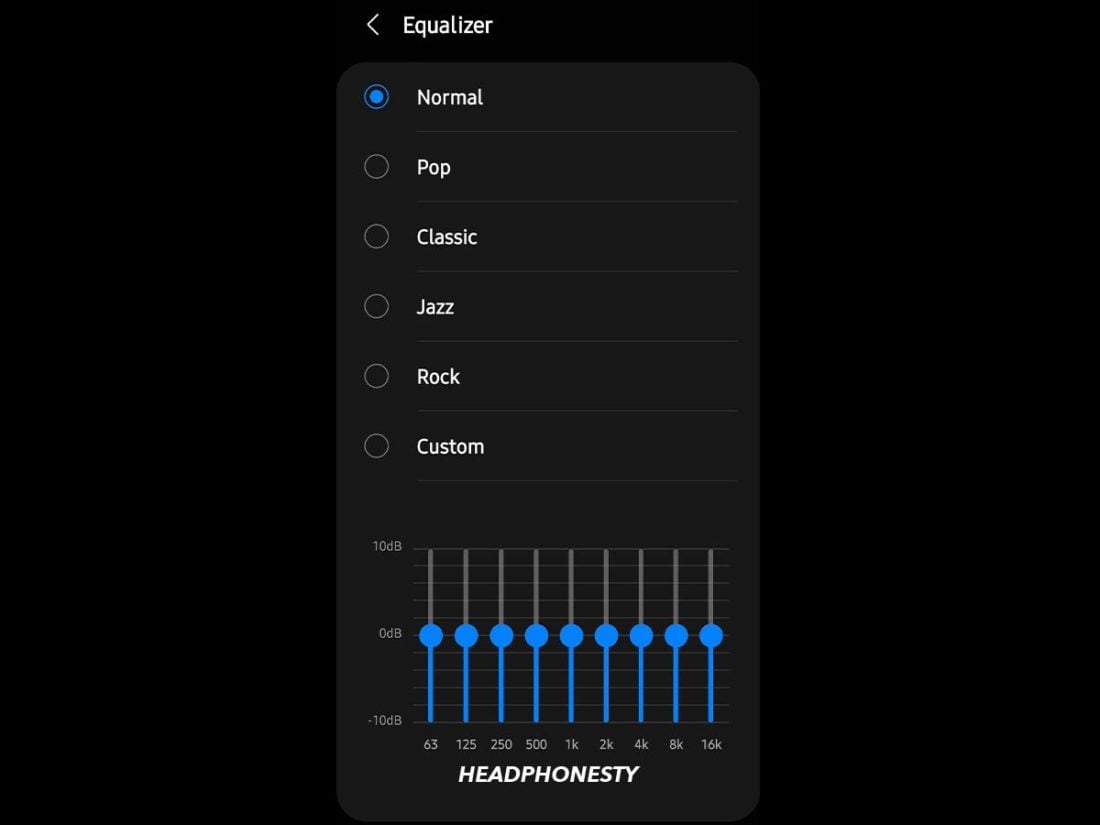
Android Spotify EQ presets
There are five EQ presets on Spotify for Android – and here’s what you can expect each of the presets to sound like:
Normal: A very basic V-shaped preset with the sub-bass, bass, upper midrange, and brilliance slightly turned up. It generates a very well-rounded sound regardless of the genre or audio device. Pop: This preset prioritizes the mids and slightly reduces the lows and highs. You can expect the general vocal sound (mostly for male vocals) to stand out from other frequencies. Classical: All frequencies are nearly equal with the exception of mids. With this EQ preset, you’ll likely hear the male vocal to be slightly quieter than the instruments. Jazz: It sounds quite similar to the V-shaped slider orientation, but the brilliance is slightly higher than the bass. The mids are slightly lowered at around -3 dB, so the vocal will be a tad quieter than other frequencies. Rock: Upper mid-range and brilliance are turned up by 3 dB and 5 dB respectively. You can expect the sound to become noticeably brighter since most rock songs are heavy on the guitar riffs.
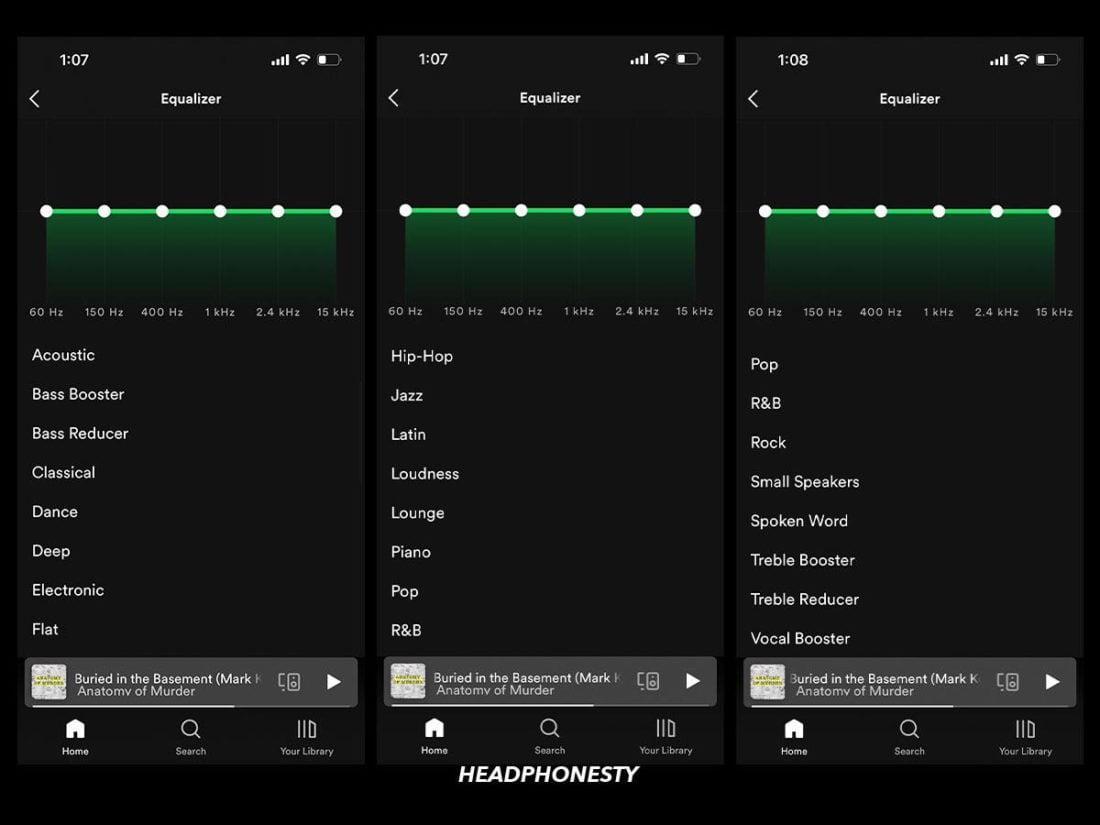
iOS Spotify EQ presets
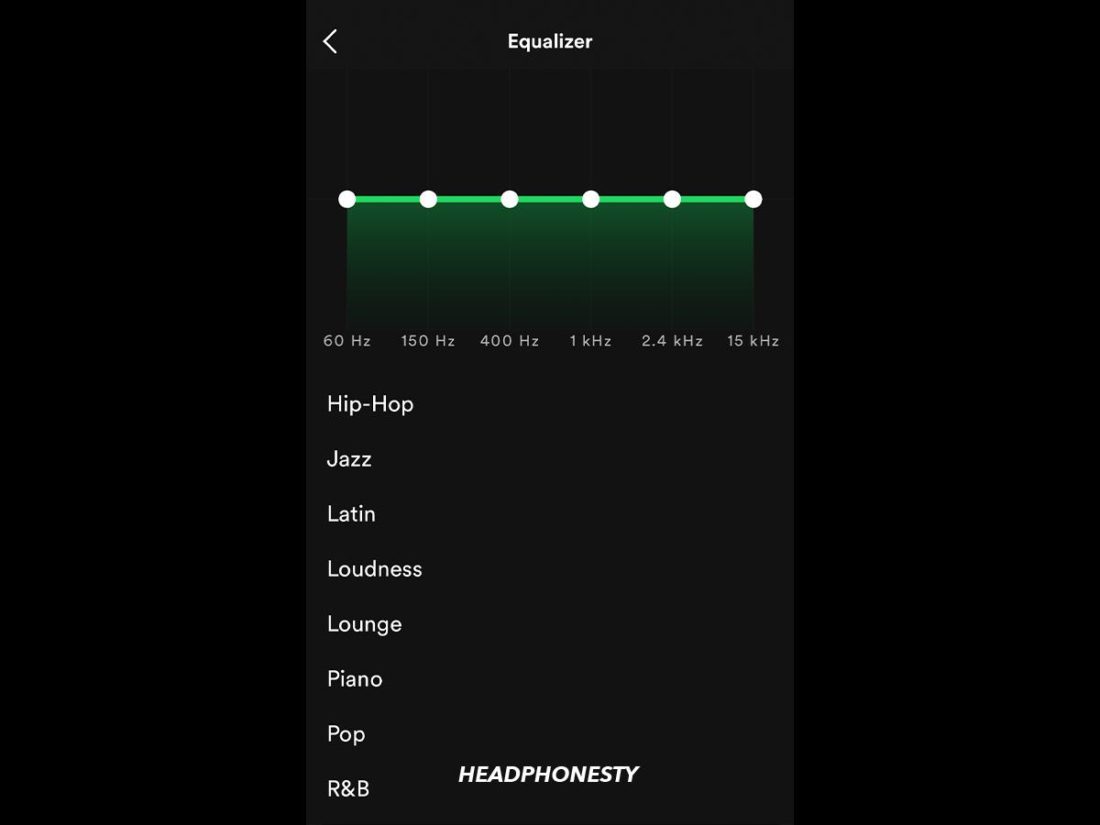
There are significantly more presets in the iOS version of Spotify compared to its Android counterpart. You can also get more control to adjust the sliders manually since the iOS app allows you to modify 6 different frequencies instead of 5 on Android. Here are some of the Spotify EQ presets you’ll find on the iOS app:
Bass Booster & Reducer: Quite self-explanatory – the first one is for increasing the bass and the other one is to reduce it. Treble Booster & Reducer: These preset help alter the higher frequency sounds in your music and podcast. Listening to podcasts with the treble booster is bliss. It makes the voices much clearer. Acoustic: The acoustic preset slightly boosts the higher midrange frequency while maintaining the lower midrange and brilliance on an equal level. Classical: If you listen to a lot of instrumentals, the classical preset can be a quick way to achieve excellent sound. This preset prioritizes the sub-bass, bass, and brilliance, making the percussion and string instruments stand out. Dance: This preset significantly reduces the brilliance while boosting the bass. Most songs will have deeper bass with this preset – but you’ll likely lose a lot of the treble frequencies like female vocals and string instruments. Deep: Deep sounds quite similar to the ‘dance’ preset, but it lowers the treble significantly. If you’re listening to songs with punchy bass, this preset will probably shake your eardrums. Electronic: The electronic preset puts an emphasis on brilliance. Using this preset will make any song sound much brighter with the treble being way more visible than other frequencies. Flat: This preset virtually doesn’t change anything from the song. Hip-Hop: This preset prioritizes the sub-bass and bass since most hip-hop songs rely heavily on beats and rhymes. Jazz: Listening to jazz music with this preset is just right. The three main sounds of this preset are the sub-bass, midrange, and brilliance. Both instruments and vocals are slightly clearer with this EQ. Latin: It sounds very bright with the brilliance turned all the way up. Female vocals and string instruments are way louder with this preset. Loudness: Despite the name that may imply everything being turned up, the loudness preset oddly boosts the sub-bass more than other frequencies. Lounge: This preset is made for relaxing and chill songs – the midrange frequencies are more visible than the lows and treble. Excellent for playing vocal-heavy songs. Piano: As the name implies, this preset will make the piano more visible. But other sounds in the same frequencies as piano notes are also much clearer. Pop: The lower and upper midrange are much clearer with this preset. But the bass and treble are slightly muted. R&B: This preset sounds much like hip-hop but with more treble. If you listen to a lot of songs with punchy bass and female vocalist, this one is for you. Rock: The brilliance is very visible with this preset. But the midrange, especially male vocals, is slightly muted in guitar and cymbal-heavy songs.
Manual EQ tuning
If you can’t find the right sound from the readily available presets, you can simply adjust the sliders manually to find just the right combination of sound for you. While the presets are excellent for people who listen to one genre at a time, they’re not particularly helpful for people who have various genres in one playlist. By manually adjusting the sliders, you can fine-tune each frequency to better match your playlist or headphones’ sound signature. In Spotify’s EQ settings, you can find 5 sliders (6 on iOS) to adjust the sound of your audio. Each of these sliders is responsible for altering the intensity of different aspects in the audio frequency spectrum. The left slider corresponds to the bass, the right slider changes the treble, the middle ones – you guessed it – alter the mids of your audio. For example, if you like the bass to stand out, try lowering the mids and highs first. This is to avoid distortion that could happen as a result of boosting certain frequencies beyond their original range.
Other Audio Settings You Should Know to Make Spotify Sound Better
While the equalizer feature is brilliant for fine-tuning your music and audio characteristics, there are other features on Spotify that can make your listening experience even better. Here are some of these features.
Audio Normalization Audio quality level Hardware Acceleration Transition settings
Audio Normalization
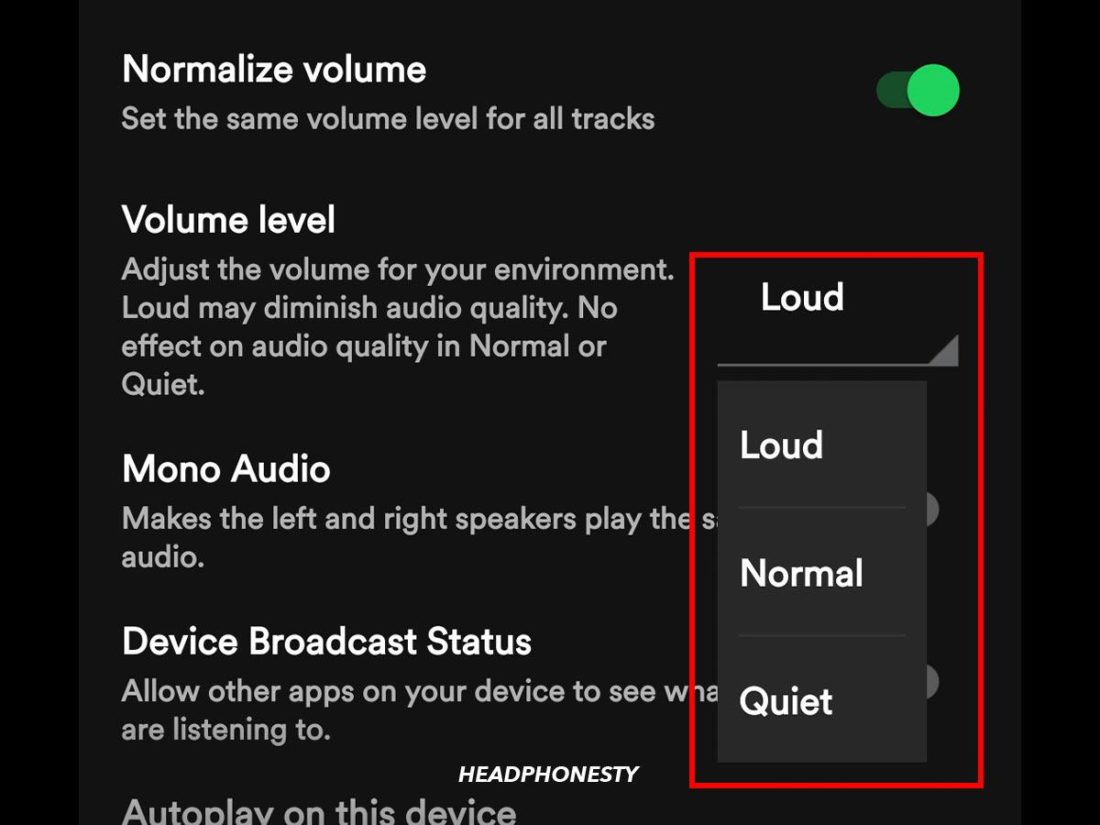
Songs are always uniquely produced and therefore have different levels of loudness to them. The audio normalization feature basically creates an equal volume of loudness for all songs that you play. If you were listening at max volume, metal and rock songs are almost always louder than genres like jazz or pop. Without audio normalization, you’d have different loudness for each song despite keeping the same volume on your headphones or speaker. You can access the audio normalization feature by following these steps: There are three audio normalization options you can use on Spotify:
Loud: Suitable to use in noisy environments. It will increase the volume of otherwise quiet songs, but also slightly reduces the sound dynamics. Normal: The default setting that balances out the loudness of soft and loud songs. Quiet: Slightly reduces the overall loudness of your songs. Suitable for a quiet environment like libraries or your room.
Audio quality level
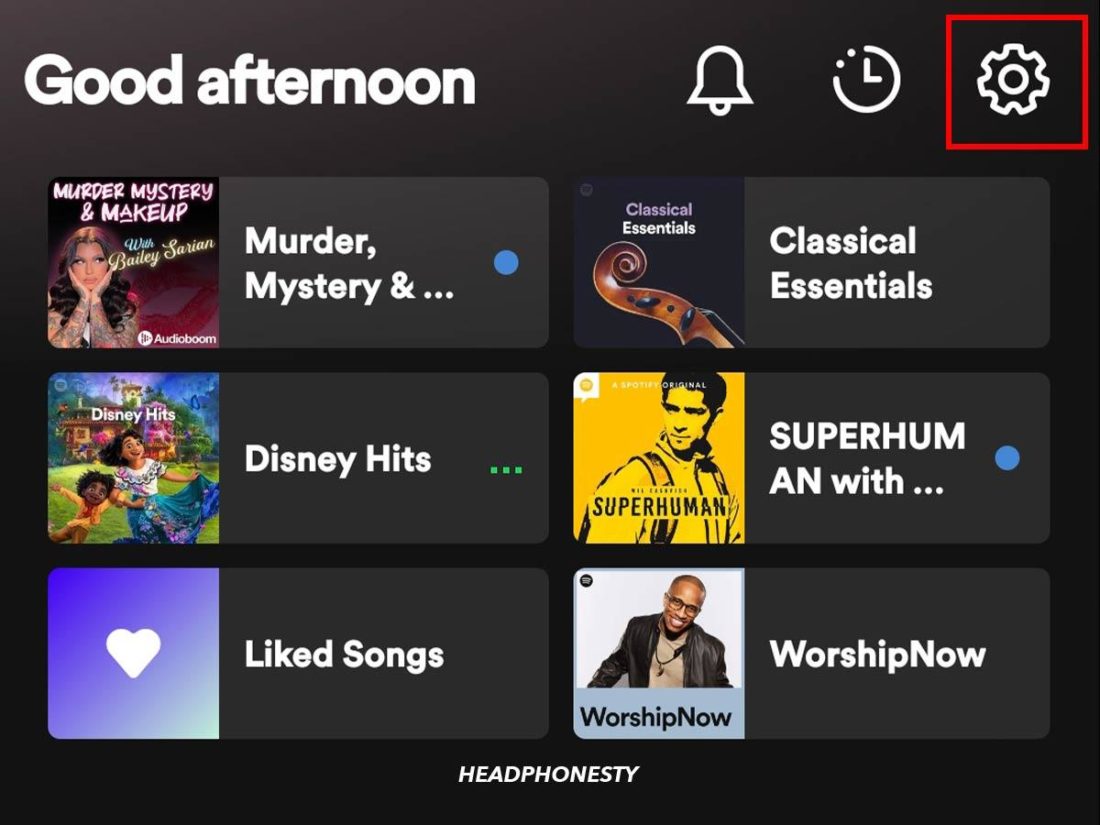
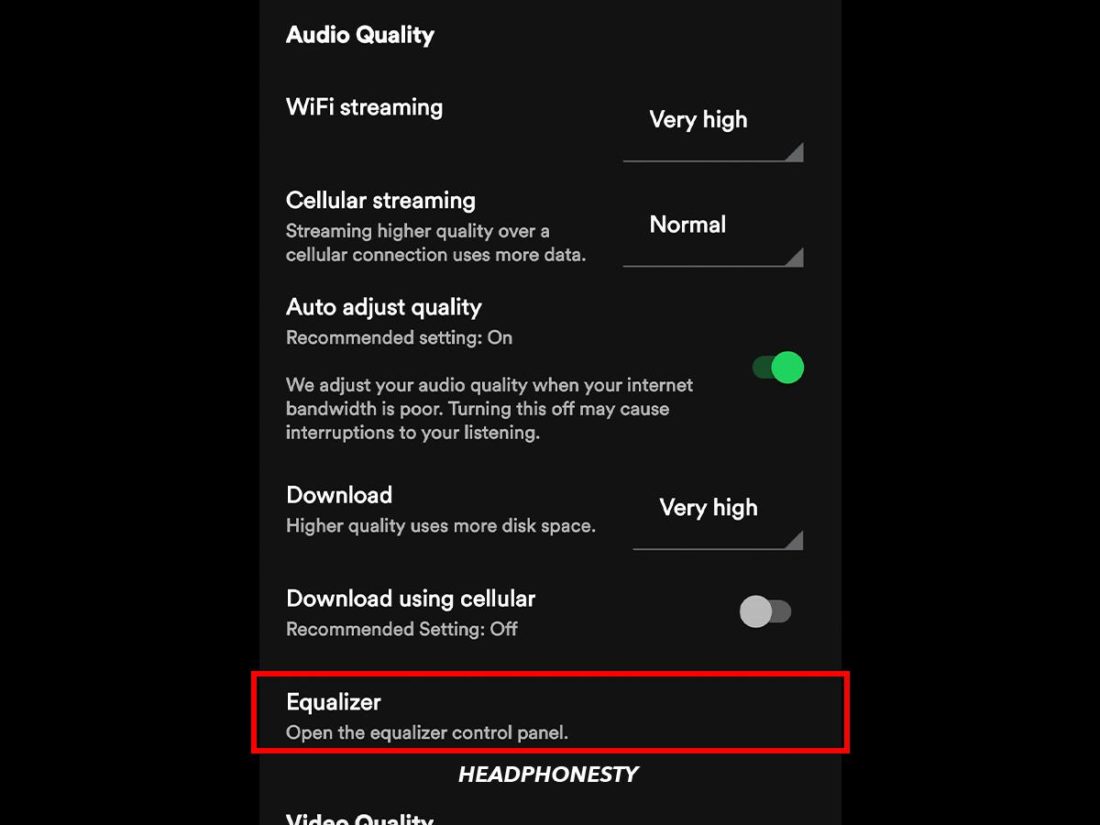
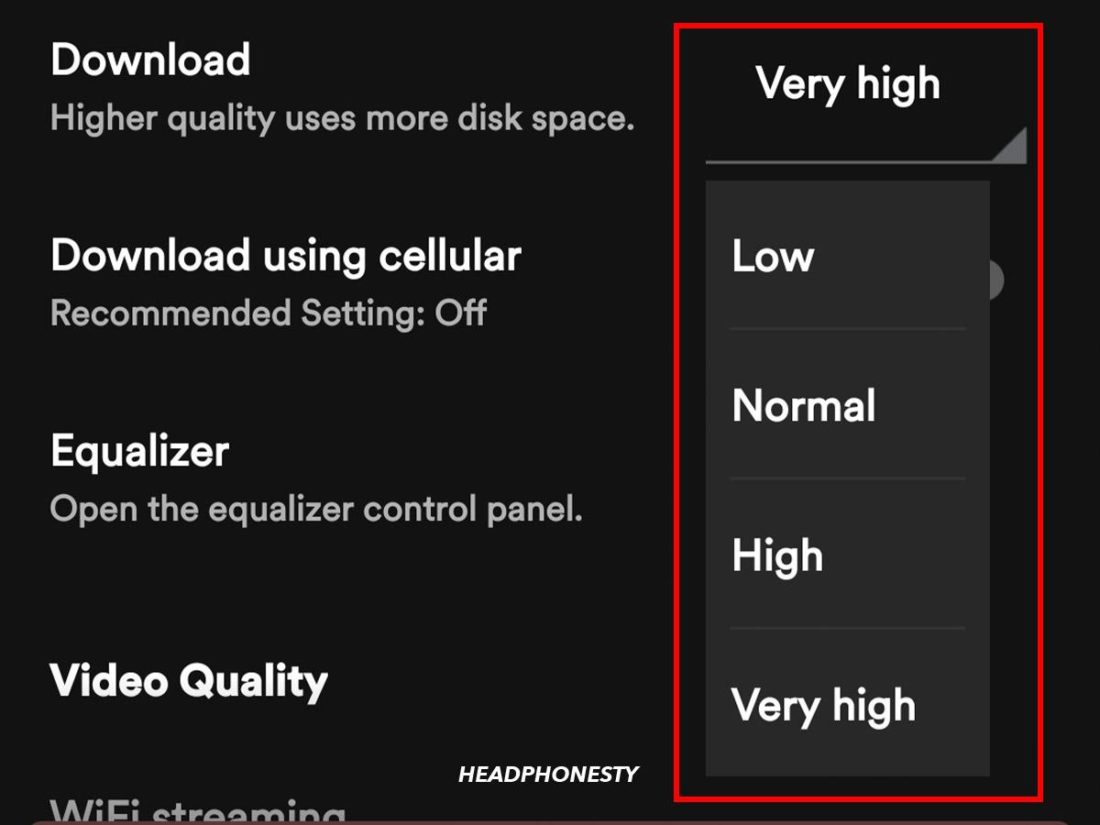
Spotify also has a feature that allows you to choose the audio quality level for the sake of a smoother listening experience depending on your internet connection or device’s storage space. When you have a patchy internet connection – like when you’re on a road trip through a remote area – streaming your Spotify playlist in 320 kbps is likely to cause stuttering and an overall bad listening experience. You can adjust the audio quality from Home > Settings > Audio Quality. There are three levels of audio quality that you can choose from:
Low: 24kbit/s Normal: 96kbit/s High: 160kbit/s Very high: 320kbit/s
If you’re using Spotify Premium, you also gain access to download songs for offline listening. There’s a separate setting to adjust download quality right below the streaming quality picker. Spotify also utilizes the cached version of a song on your device. If you’ve streamed a song on “very high” quality but you set the download quality to “low”, you’ll be able to listen to the cached version of “very high” quality. Unfortunately, offline listening is only available to Spotify Premium users. If you’re using the free version, you can only stream songs through an internet connection. Learn more about the difference between Spotify free vs premium to see if you should upgrade your account.
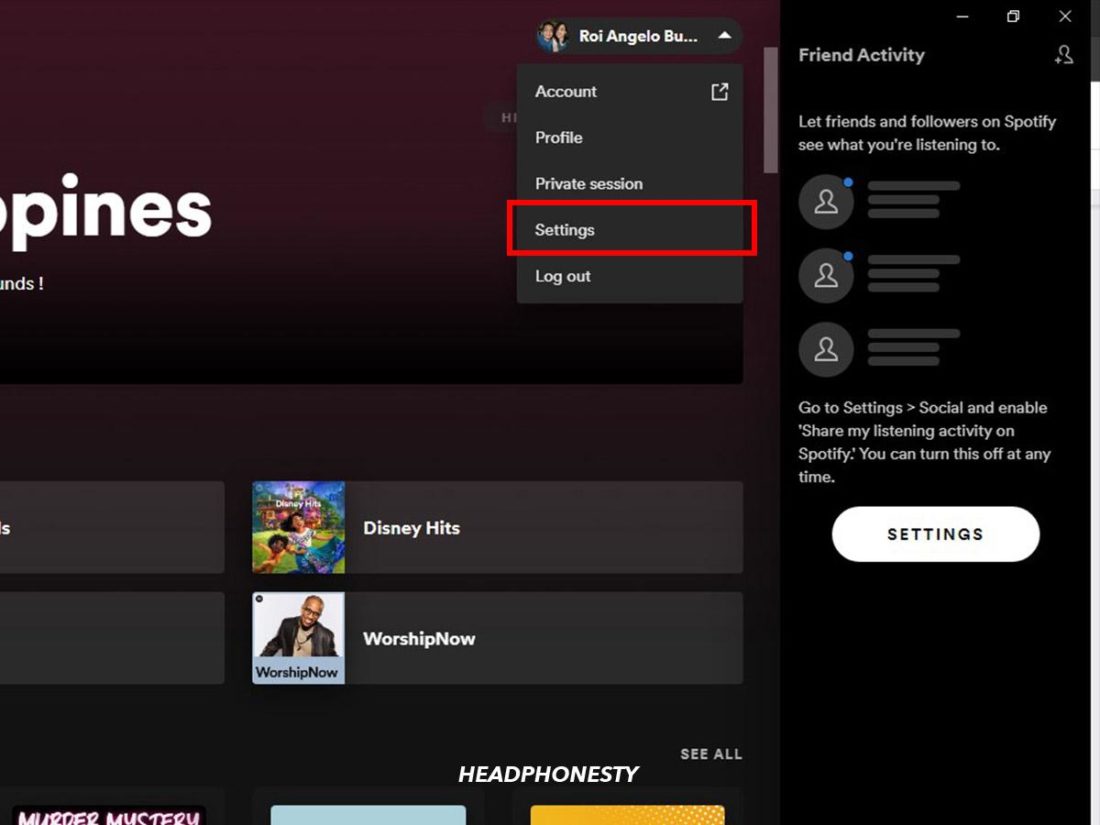
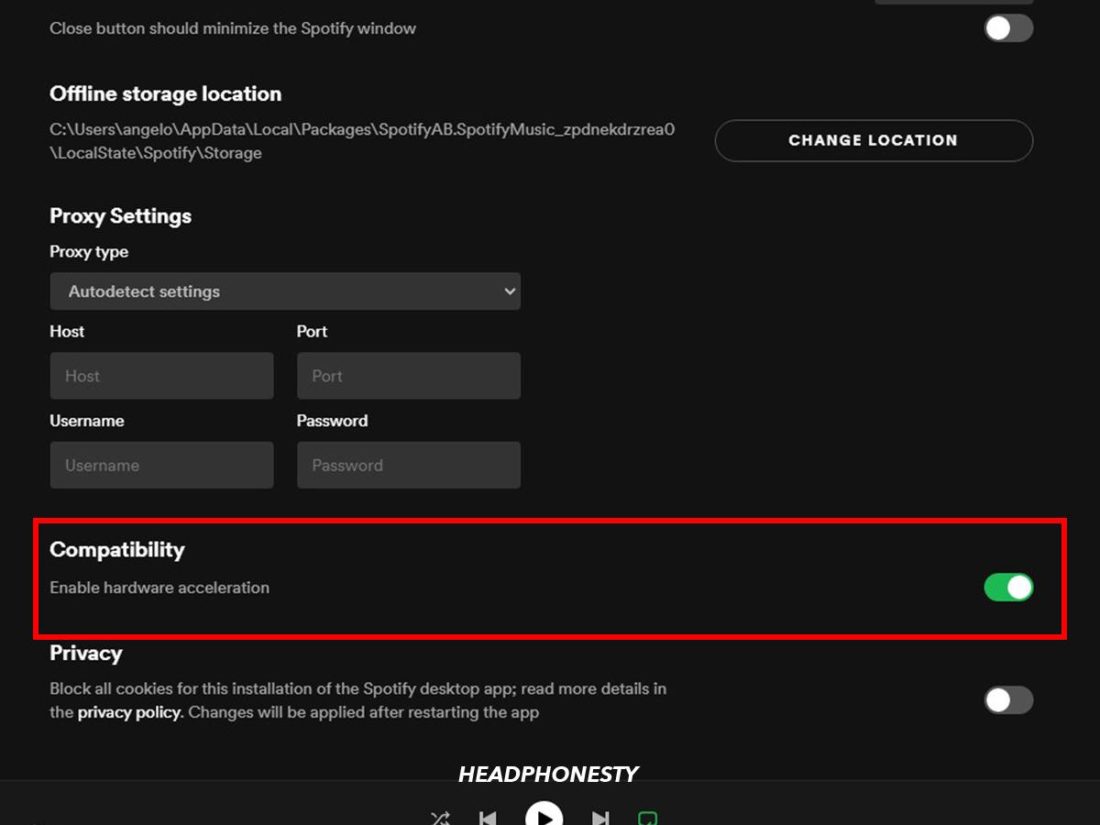
Hardware Acceleration
The hardware acceleration feature grants Spotify permission to offload some of the computational tasks onto your device’s hardware instead of doing everything through their software. As of writing this guide, hardware acceleration is only available on the Spotify desktop app. You can access the hardware acceleration feature by following these steps: Toggling hardware acceleration helps to optimize the Spotify app, making your overall experience better when navigating through the various features.
Transition settings
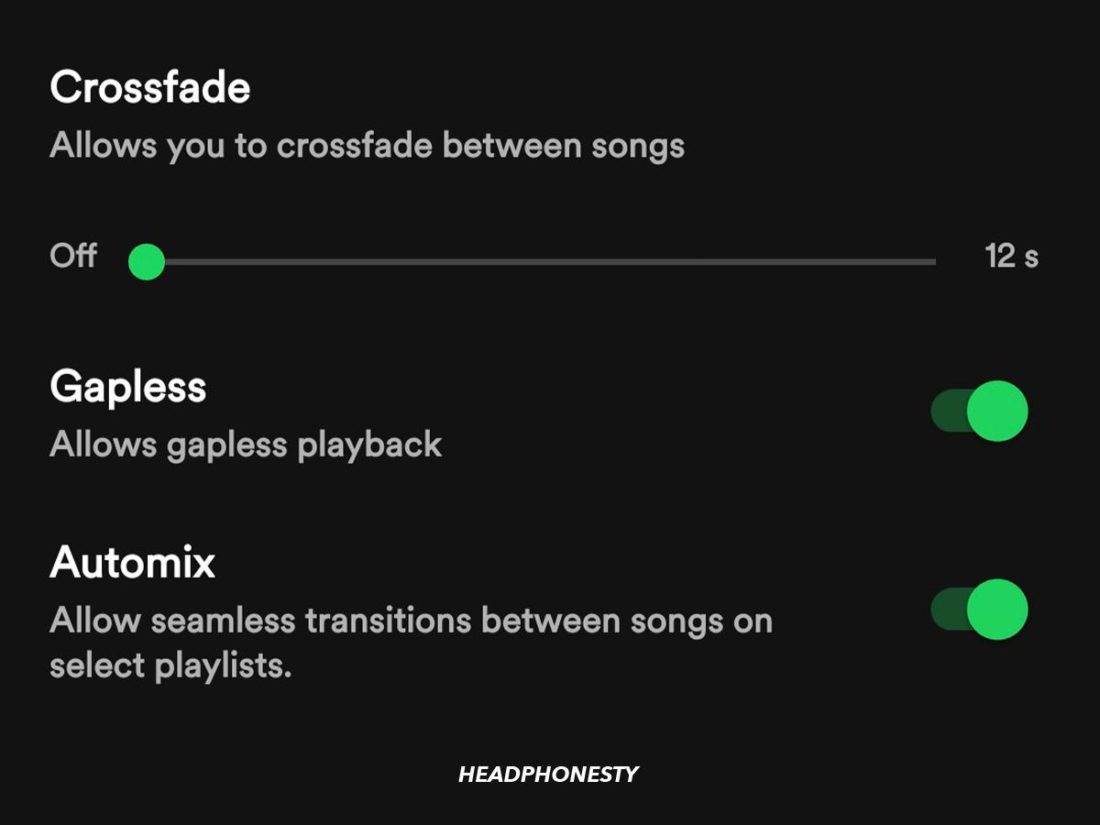
The transition settings are a series of configurations that can make the switch from one song to another within a playlist feel much smoother. To access the transition settings, you can navigate from Home > Settings > Playback. You will find three transition settings that you’ll get to play around with on Spotify:
Crossfade: This feature allows you to remove the silence between songs by subtly mixing the end of your current song to the beginning of the next one. Gapless: If you like to experience your songs pure from the start to finish, gapless is an alternative configuration that lets you remove the gap between songs without mixing them. Automix: This feature utilizes artificial intelligence to create a smooth transition by crossfading, skipping, or even adding transition sound to make the jump between one track to the next feel seamless.
Conclusion
Spotify is an excellent and familiar platform for those who want to listen to music on multiple devices with one account. By adding an equalizer feature, Spotify lets their user play around and customize the sound of their music for a better listening experience. There are various equalizer presets that you can use on both Android and iOS, but unfortunately they won’t always deliver the sound that you prefer. In that case, manually adjusting the slider can help you fine-tune the sound of your Spotify playlist. We hope that this article can help you find the perfect sound for every one of your Spotify playlists. What’s your go-to equalizer setting on Spotify? Let us know in the comments!