While AirPods have widely dominated the market in the past few years due to their convenient features and design, they are not flawless. Now and then, your AirPods’ status light will flash orange, indicating an ongoing issue. What’s annoying is that you can’t really tell what the exact problem is since you’ll have no other information except the orange light. Not to worry! In this article, we’ll decode what AirPods flashing orange could mean and what you can do to fix the possible problems. Without wasting time, let’s dive right in.
Why Are My AirPods Flashing Orange?
The indicator light, or the tiny dot of light on your AirPods’ case, is your AirPods’ way of communicating with you. Different colors and blinking patterns signify various issues or statuses of the device. Paying attention to the different status lights and knowing what they mean can help you understand what’s going on and fix the issues (if there are any) with your AirPods. If you’re still new to deciphering what the indicator light means, follow our guide below.
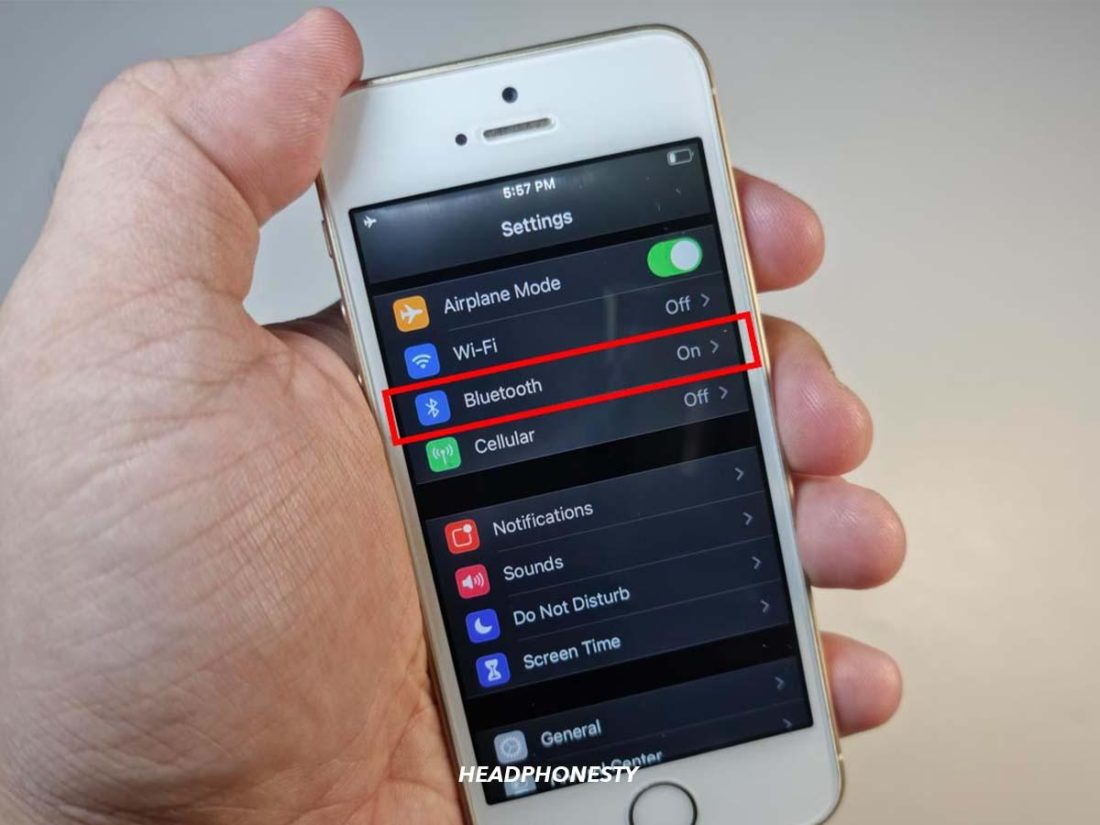
Flashing white light: AirPods are in pairing mode. Check out our separate guide for when your AirPods are flashing white but not connecting. Amber/Orange light (with AirPods in): Your AirPods are charging inside the case. Amber/Orange light (without AirPods in): Your charging case doesn’t have enough charge to fully recharge your AirPods one more time. Amber/Orange light (while connected to power source): AirPods and the charging case are both charging. Green light (with AirPods in): AirPods are charged sufficiently. Green light (without AirPods in): The AirPods’ charging case is charged sufficiently. Green light (while connected to power source): AirPods and the case are fully charged. Flashing green light: One of your AirPods might not be detected by the case. Flashing amber/orange light: Your AirPods are experiencing a pairing error. No light: Either they are not in use or have run out of battery. Connect with your device to verify the status.
How to Fix AirPods Flashing Orange Light
The steady orange or amber light on your AirPods and AirPods Pro can signify a battery concern. To get this out of the way, charge your AirPods, and you’re good to go. However, a flashing or blinking orange light can result from a general connectivity concern. While you won’t be able to pinpoint the problem and solve it directly, there are some things you can try out to address any connectivity glitches. We’ve discussed several methods below on how to stop your AirPods and AirPods Pro from flashing orange light. Some of these include:
Reset & reconnect your AirPods Restart your audio source Recharge the AirPods and the case Clean your AirPods Update your AirPods’ firmware Try Apple Support
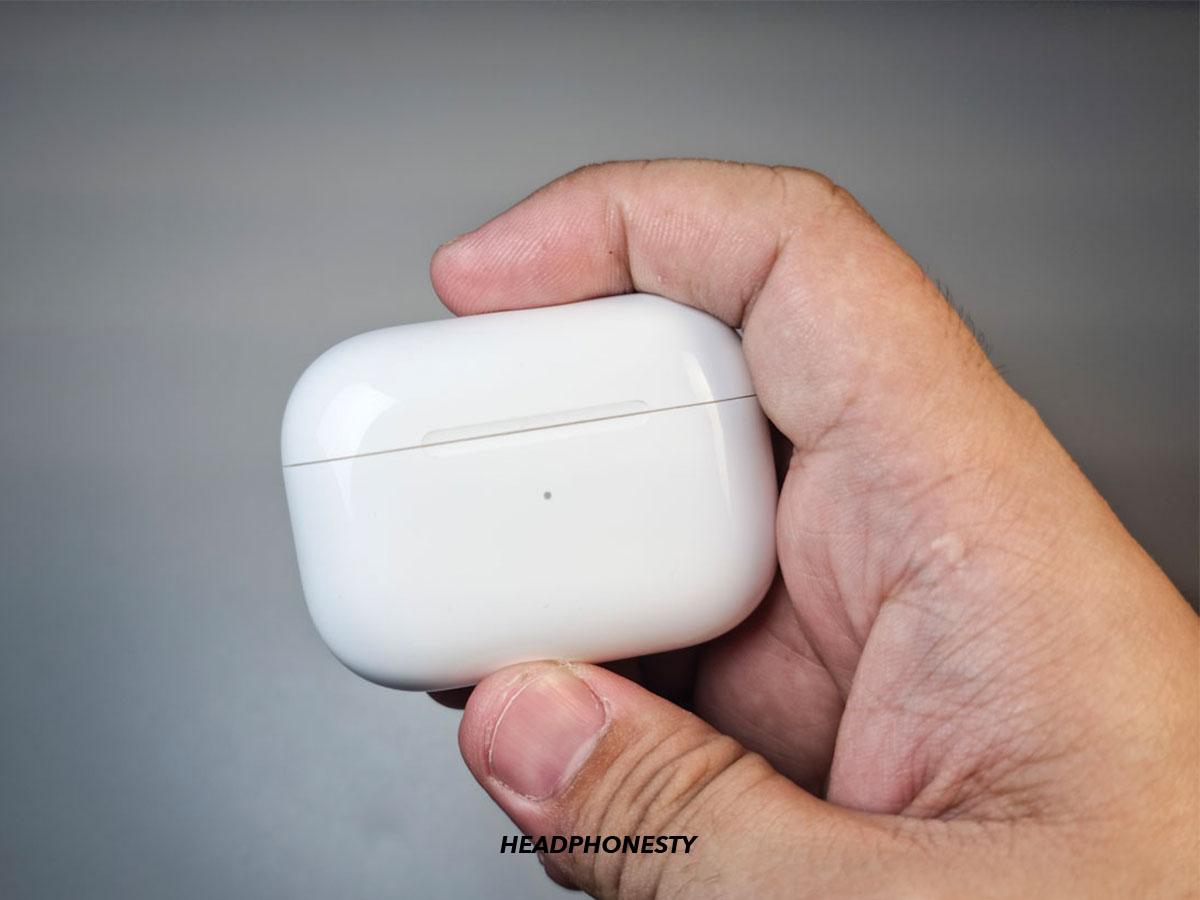
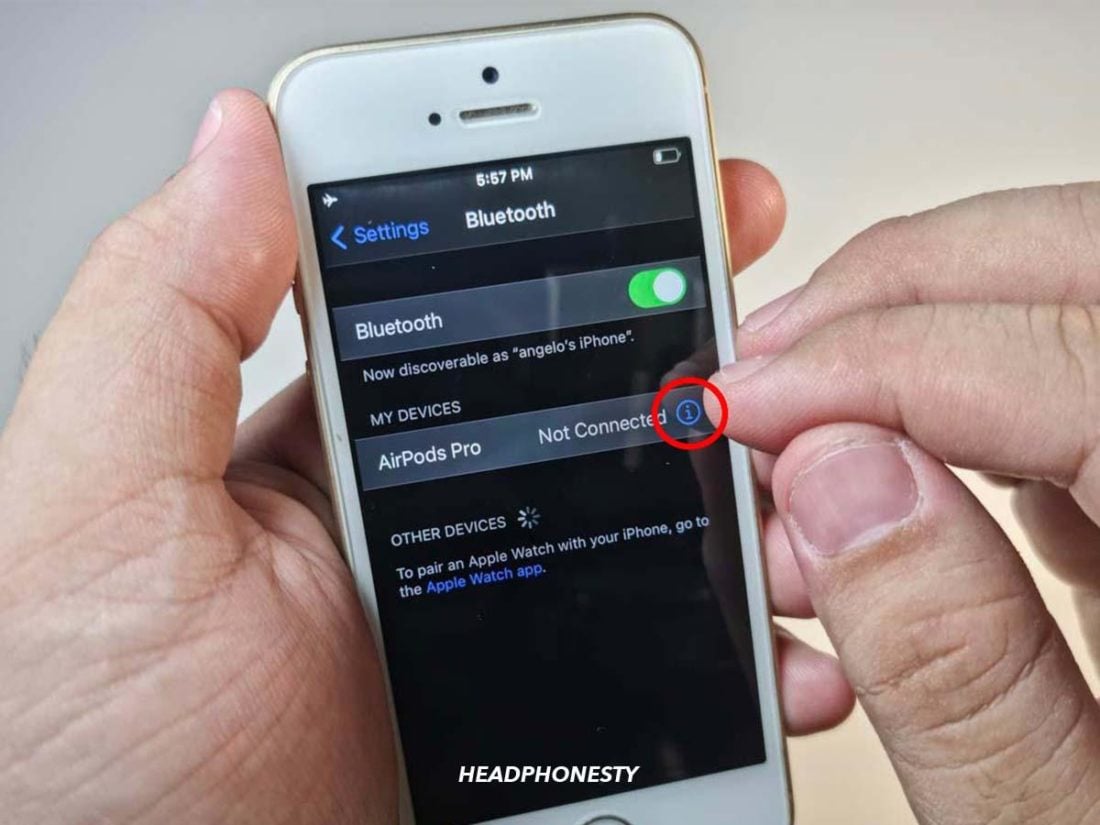
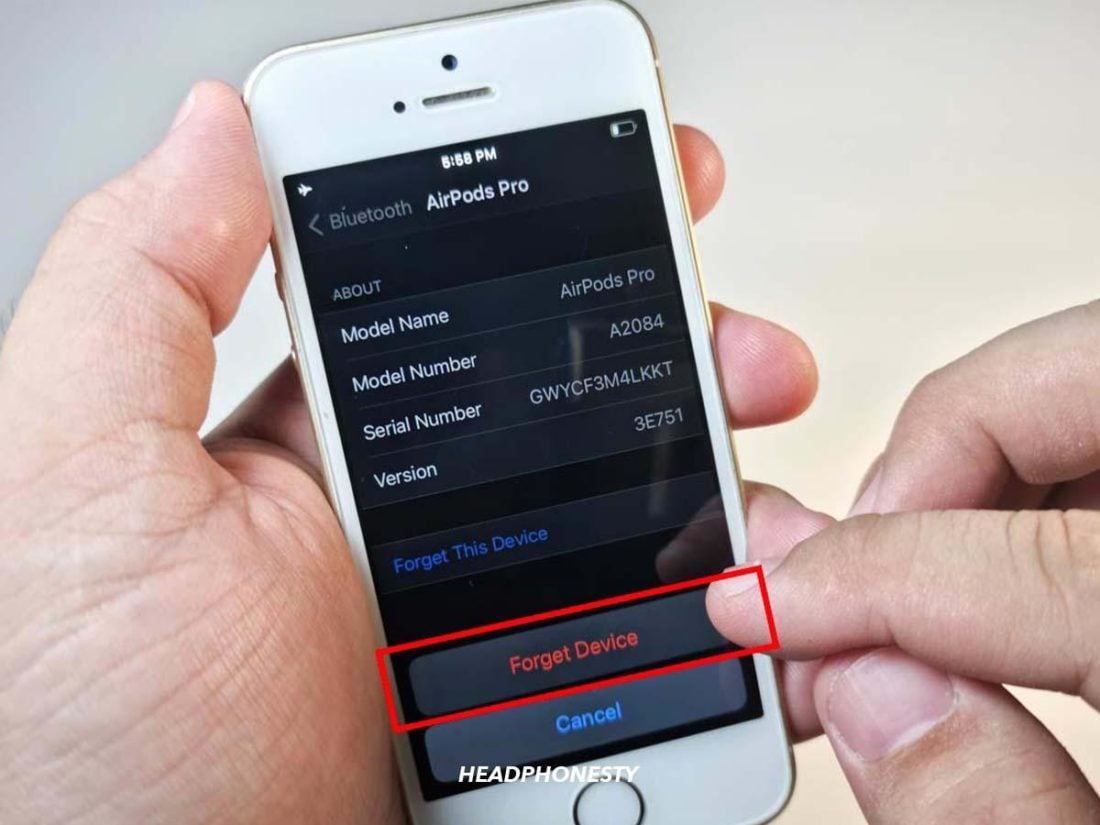
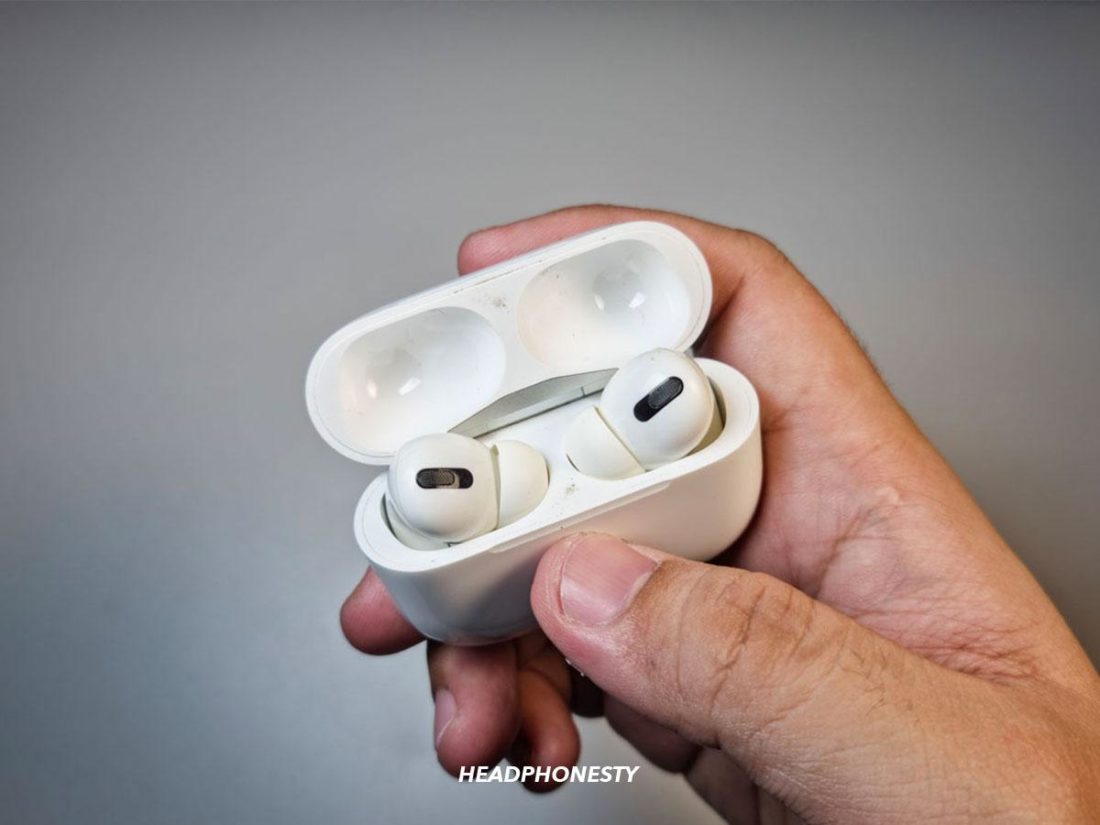
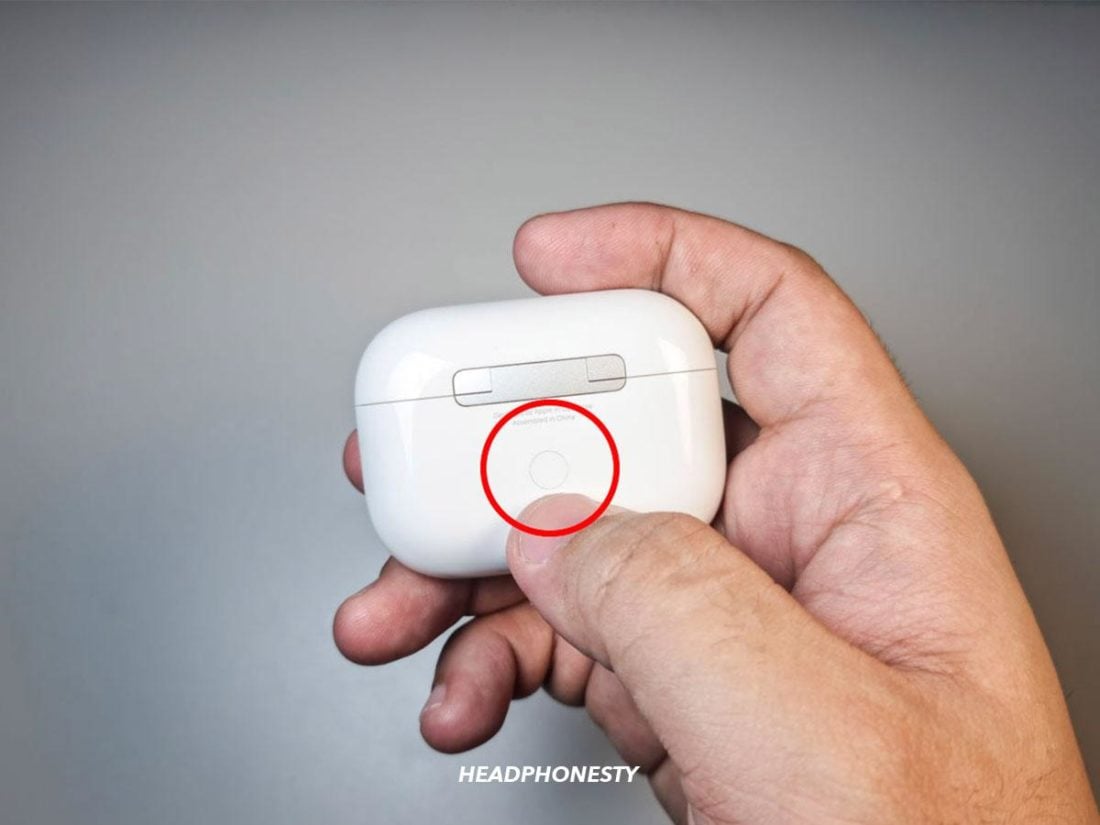
Reset & reconnect your AirPods
First up is perhaps the most basic yet effective of them all. A simple reset can, most of the time, solve whatever problem you may have on your AirPods. Resetting deletes all existing data, including any part that may have bugs and issues, and gives your device a chance to start on the right foot. For AirPods and AirPods Pro, though, here’s how to reset them properly:
Restart your audio source
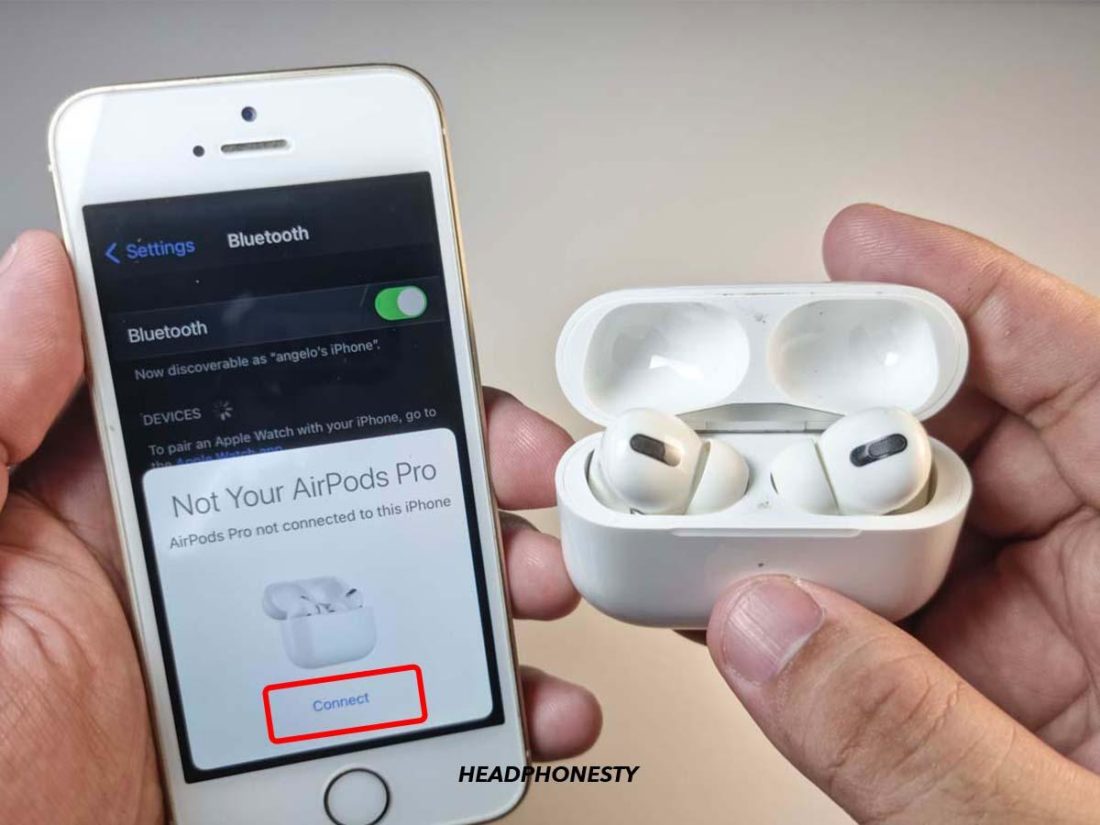
Aside from the AirPods or AirPods Pro, you can also try restarting the device you are using them with. Much like your AirPods, the audio source can also experience some issues that may be causing connectivity problems. Restarting your audio source can help clear out open apps, even those running in the background that may be contributing to connectivity issues. It also prevents crashes and saves your storage space and battery life. You may be using your AirPods with your phone, iPad, Android, PS4, Xbox, or Switch – so restarting may vary from one device to another. Most of the time, a simple long press on the power button of the device you’re using may just do the trick.
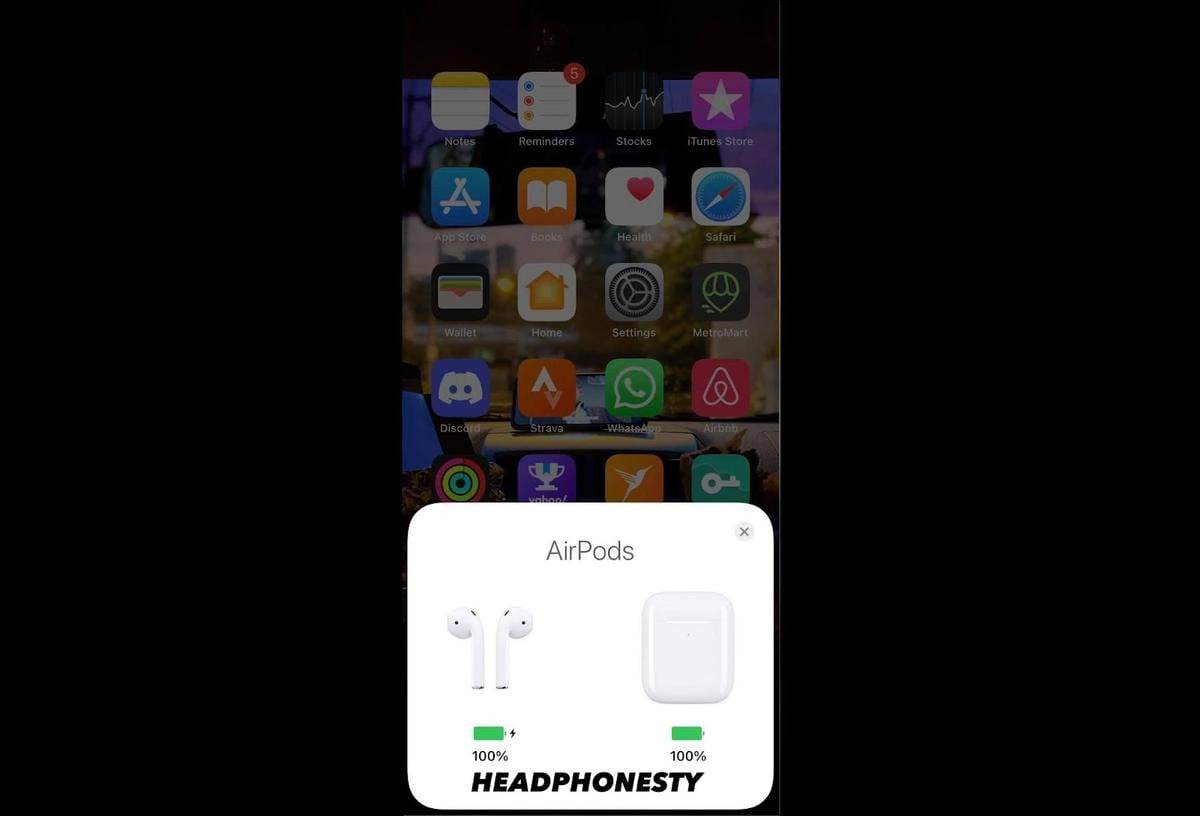
Recharge the AirPods and the case
For any of the existing AirPods variants, the orange light signifies that you need to charge them already. So, if your AirPods still flash orange, maybe a quick plug into a power source can solve it. To check whether your AirPods or AirPods Pro are actually charging, simply bring them closer to your Apple device and open their lid. A window should pop up on your screen showing the battery status.
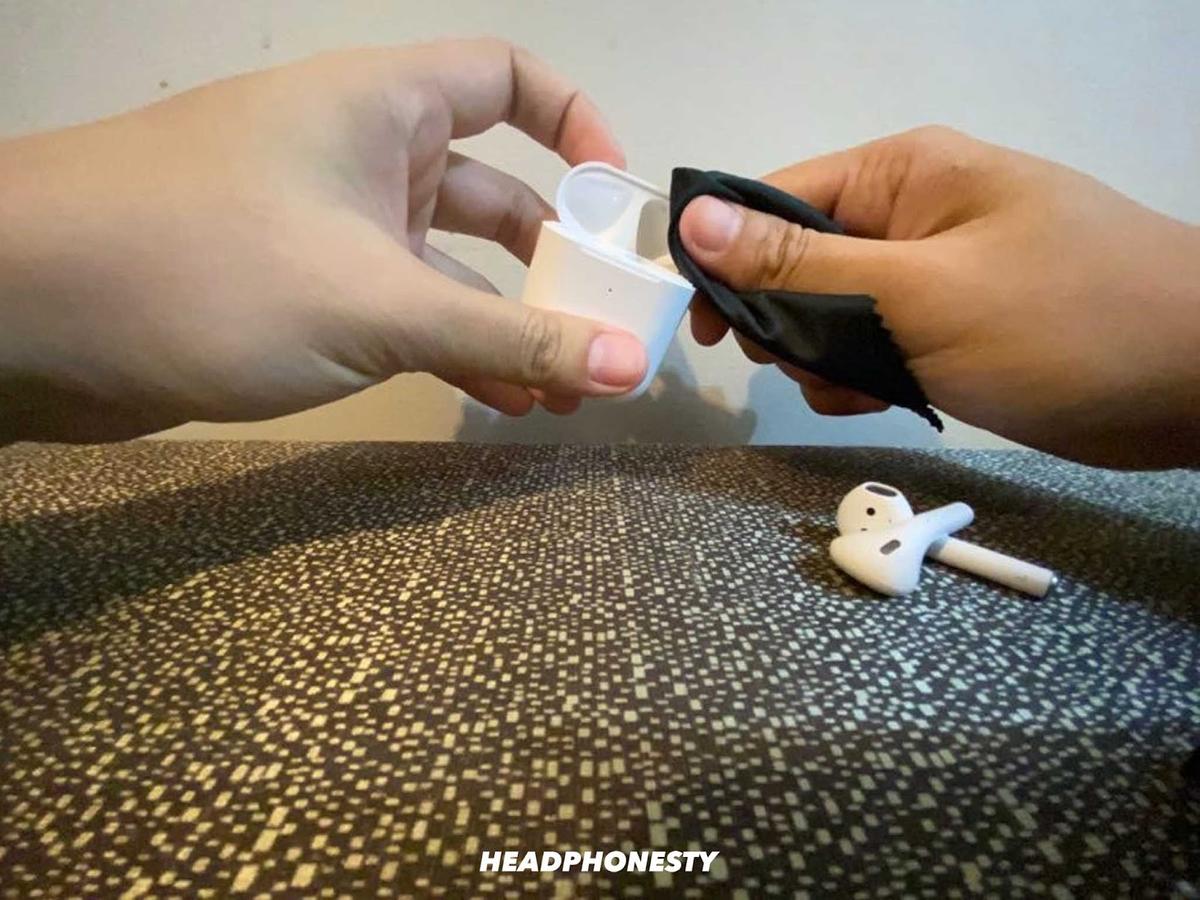
Clean your AirPods
Dirt and debris are something you don’t want to accumulate on and in your AirPods. The reason being this gunk can inhibit proximity sensors and prevent proper connection. They can also cause minute contact problems inside the charging case, resulting in issues that can prevent charging or cause your AirPods’ lid not to close properly. Cleaning your AirPods or AirPods Pro sounds straightforward, but there’s actually a proper way to do so to prevent any damage. This involves using the right cleaning agent and ancillary tools, and knowing the right places to clean. You will need:
70% isopropyl alcohol Cotton swabs A toothpick A toothbrush
Here’s how you should clean your AirPods or AirPods Pro:
Update your AirPods’ firmware
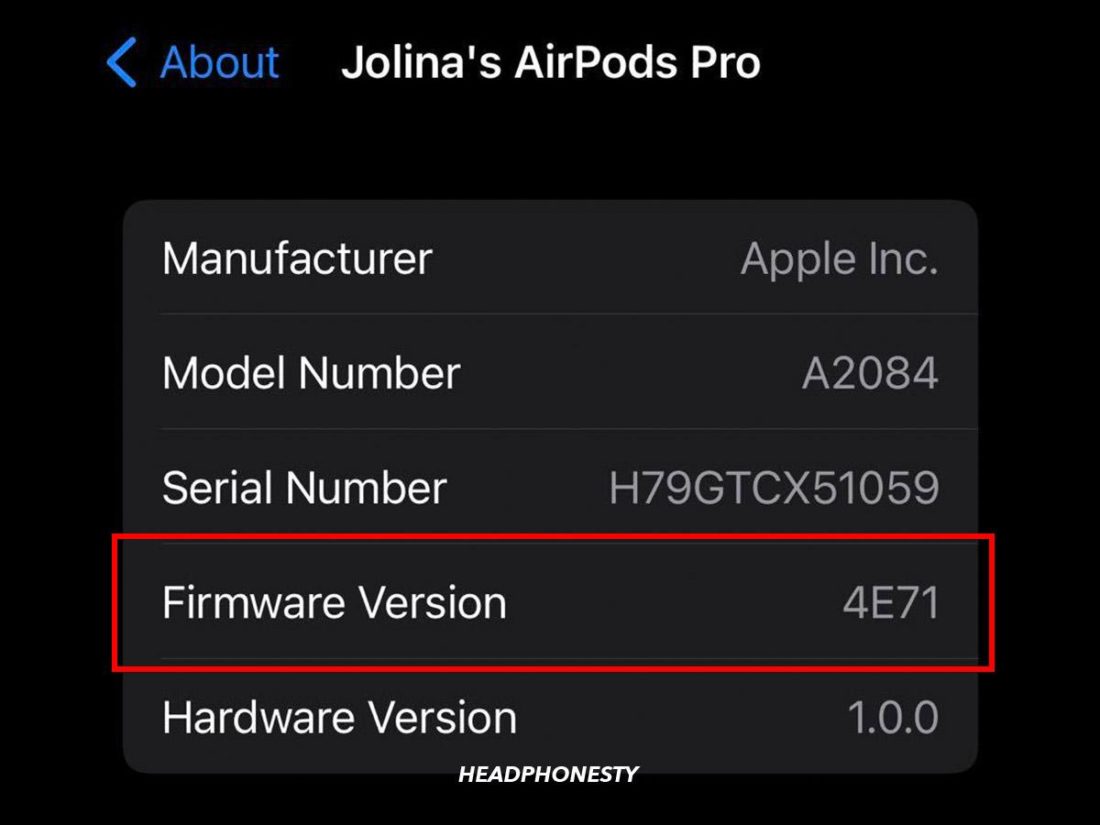
Your AirPods are run by simple firmware. However, discrepancies between AirPods’ firmware and the iOS version may cause bugs that result in connectivity issues from time to time. Another possible issue that may arise is when the left and right AirPods don’t seem to have the same firmware version. This can result in one of them not working. Frequent firmware updates can help keep these problems at bay. Unfortunately, you can’t manually install or force updates to your AirPods’ firmware. In fact, Apple doesn’t even release official news on firmware updates or provide the option to decline them. What you can do is check your AirPods’ firmware and match it with the latest firmware release. Here’s how:
Try Apple Support
If all else fails, call in the experts. Apple Support allows you to access Apple’s solutions database or perhaps connect with someone from Apple who can support you. Apple Support can be intimidating at first, but the cues are actually very clear. To help you with that, here’s a run-through of how you can use Apple Support to address the flashing orange light concern.
Bonus: Fixing Other AirPod Issues
If you’ve exhausted every possibility mentioned above, don’t give up just yet. Make one last push before doing so. You see, the orange light issue sometimes results from a bigger underlying problem with your AirPods. In that case, you could also try to fix other facets related to your AirPods’ functionality. Fortunately, we have the right articles and tips for that! One of these might just be the one you need:
AirPods Keep Disconnecting: If you get random disconnections on your AirPods, this article compiles several troubleshooting methods you can apply across various devices and platforms. One AirPod Not Working: Listening to only one AirPod because the other one doesn’t work is annoying. This article discusses the possible reasons why one of your AirPods isn’t working and how to troubleshoot it on various devices. AirPods Not Connecting to iPhone or iPad: As good as they are, your AirPods are useless if they won’t connect to your devices. Whether you’re using an iPhone or an iPad, this article has the solutions for you. AirPods Not Connecting to Mac: If your AirPods work fine with your iPhone, but have issues connecting to your Mac – this article has all the information you need to troubleshoot the connection issue. AirPods Not Connecting to Android: While there are caveats, you should be able to use AirPods on Android. Read through this article if your AirPods won’t connect to your Android phone. Ways to Know if Your Airpods Are Fake: Worried you were tricked into buying fake AirPods with dozens of issues? This article compares original AirPods with counterfeit ones to see where exactly to look. AirPods Not Working: As great as they are, AirPods aren’t immune to problems. This ultimate guide was created to help you fix all sorts of problems interfering with your AirPods’ functions, including low volume, lost AirPods, lost AirPods cases, and more.
Conclusion
If everything worked out well, that bothersome orange light should be gone by now. You can now go back to listening to your favorite music and watching your favorite shows without any worries. Plus, the next time you see that orange light again, you won’t panic anymore because you now know what to do! Which of the above solutions worked for you? Do you have any additional tweaks that have helped you fix your AirPods? Please share it with us in the comments section!